How to set up your online store
Log into the shop management console
Log into your store management console using your email address and password. You can access it here:
https://ecomm.izetech.net/auth/login
If you can’t remember your password, click on the “Forgot your password” link. This will email a code to your Izetech registered email address, and guide you through the process to reset your password


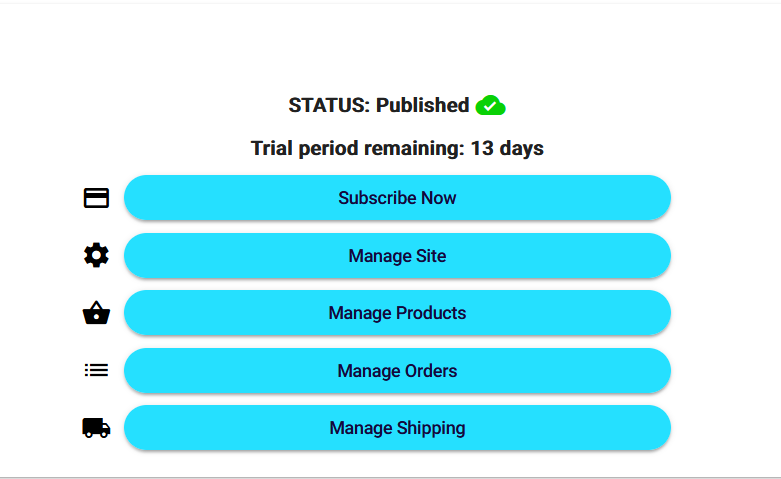
Once you are logged in, you’ll see a menu. The number of days left in your free trial is displayed above the menu. Once the free trial has expired after 14 days, you can click on the ‘Subscribe now’ button to start paying your subscription.
To start setting up your site, click on “Manage Site”. This will take you to the site setup page


Set your shop title
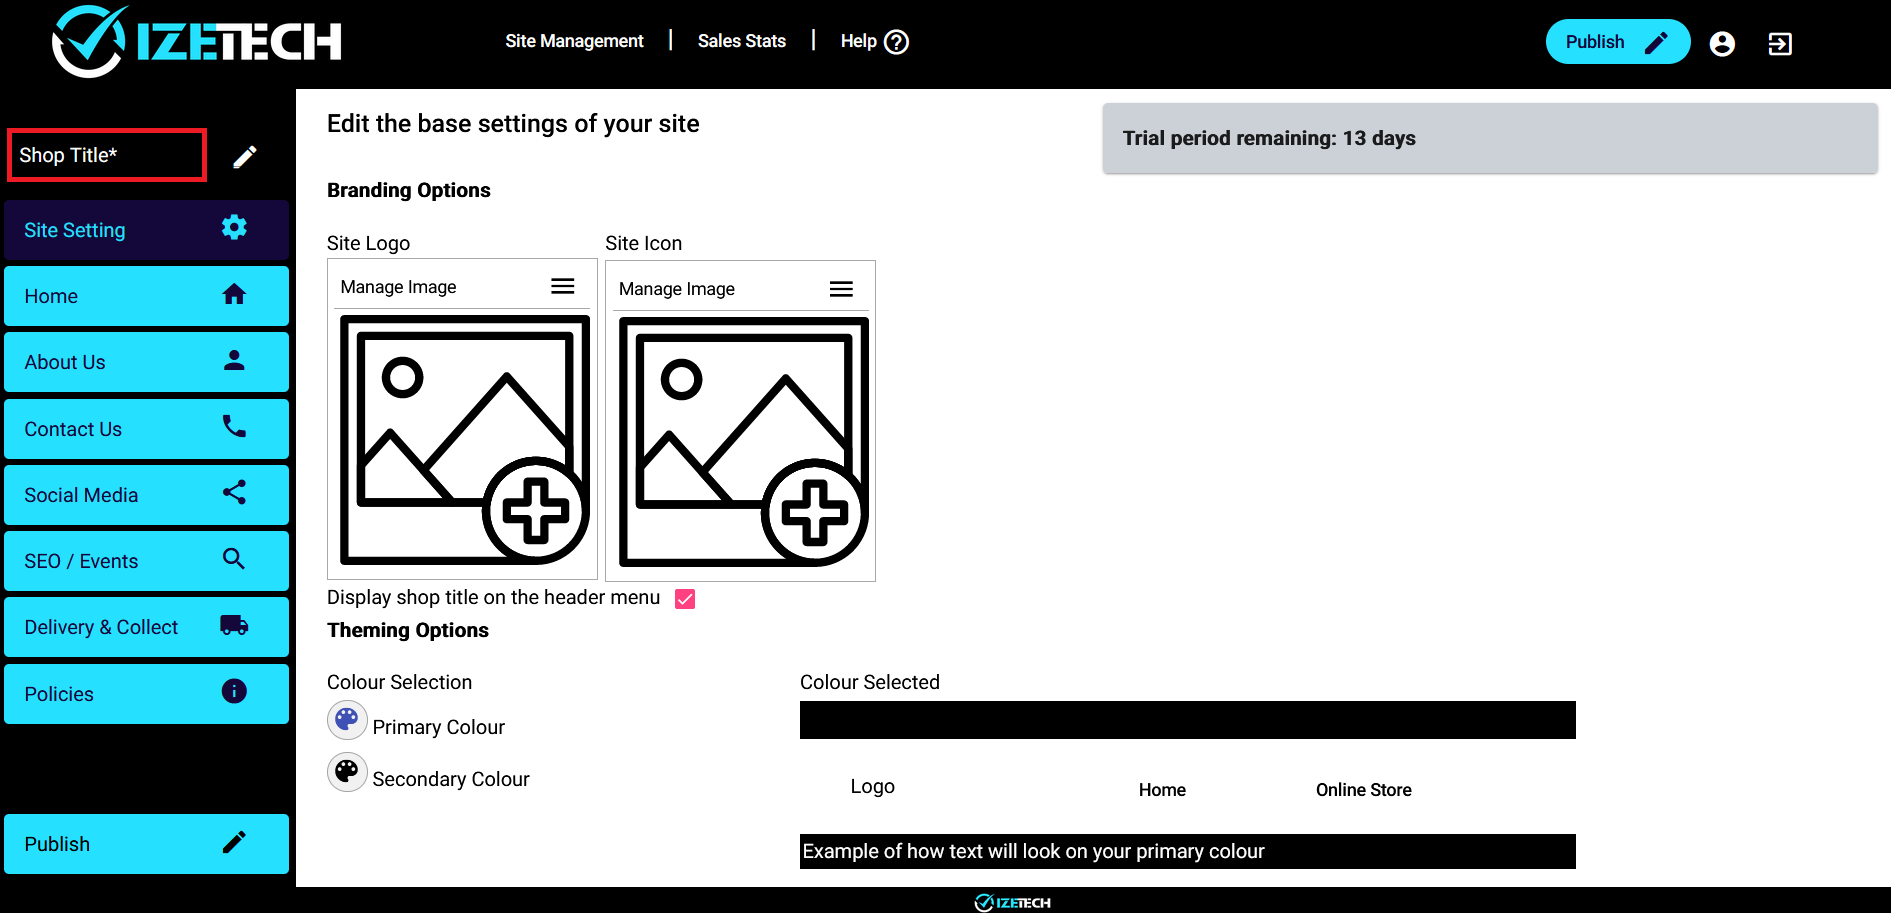
Give your site a title – you can add this in the top left hand side of the screen, just above the menu. Note that the shop name can be a maximum of 60 characters long.
The shop title will display on the web browser tab when your clients open your site.
The title can optionally be displayed on your site next to your logo – switch this on and off in “Site Settings”


Set up your site basics
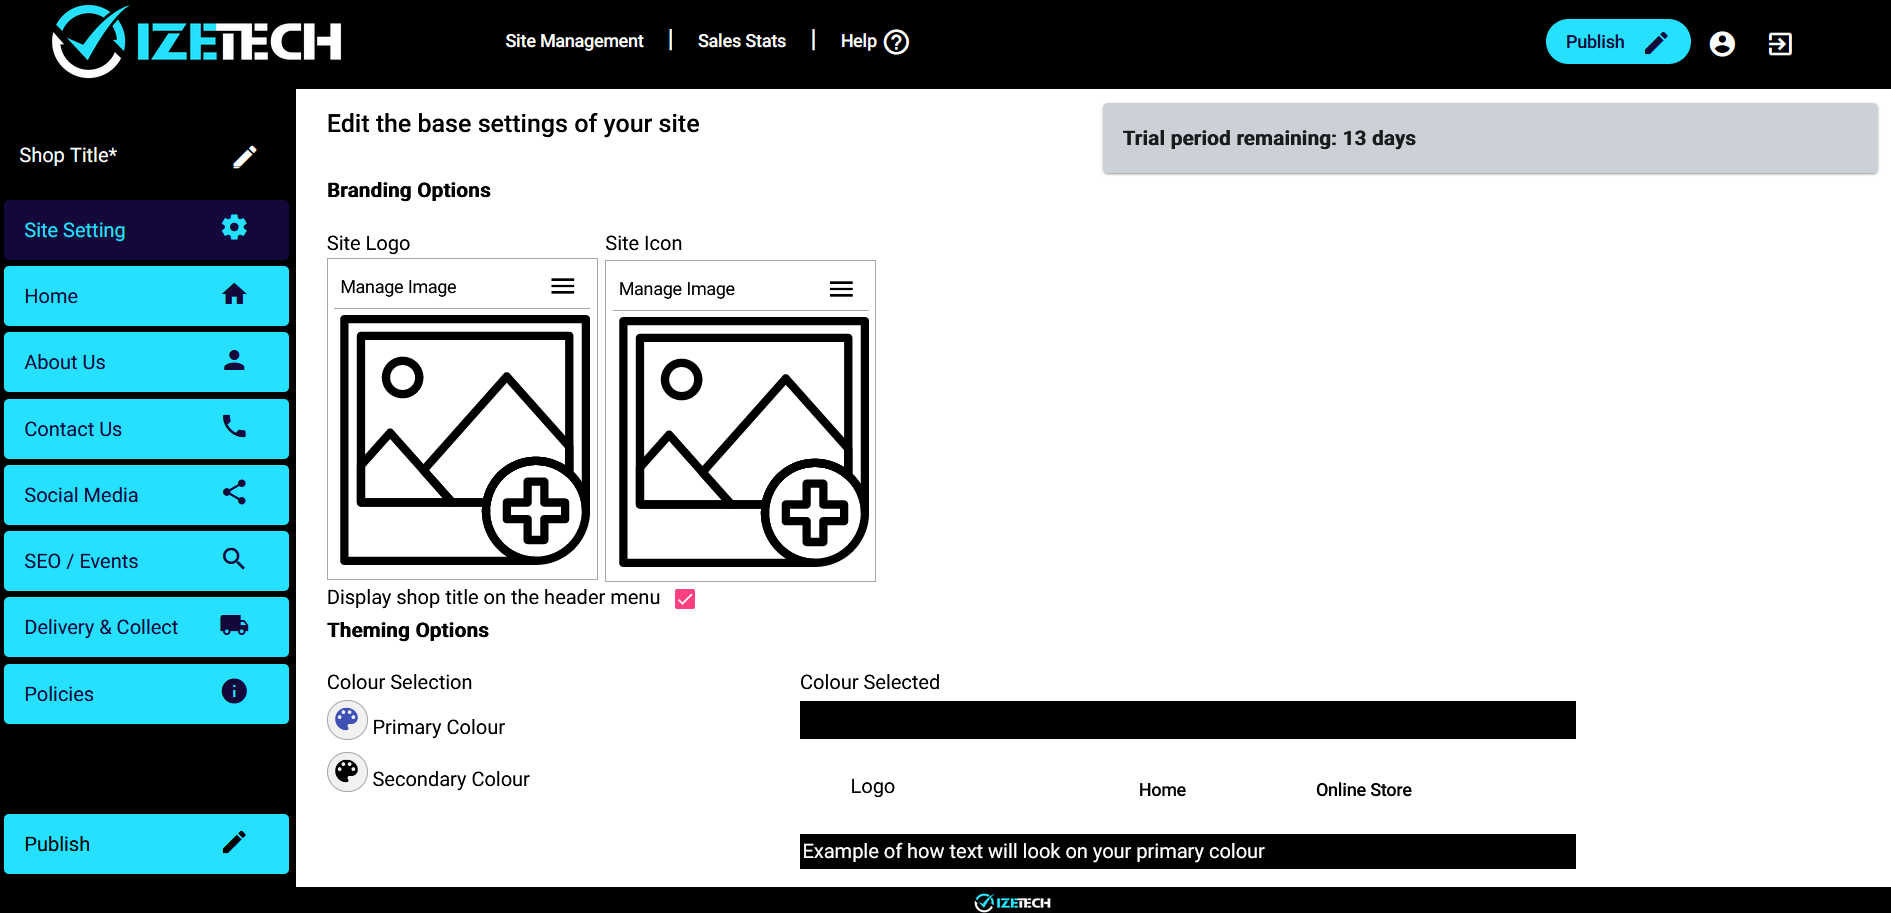
First, upload your company logo. The logo will be displayed on the top left hand side of your store, and also in all emails that get sent out by the store.
You can also upload a favicon – this is a smaller, simpler logo that is displayed in the web browser tab – this is optional, but does add to the branding of your store.
Now, select your site colours by clicking on the artist palette icons in the “Colour Selection” section. Select a primary and secondary colour for your store, that are complimentary to your logo and branding. If you have the hex codes of the colours you’d like to use, you can capture them manually. Otherwise, select a colour from the colour map displayed on the screen.
Once you have set the colours and uploaded the logos, click on Save.
Note that no changes will show on your store until you have published the changes.


Set up your home page
The Izetech home page design consists of a banner carousel of up to 5 images, a company slogan, a company description and 3 optional footer images with descriptions.
Click on “Add images” to add banner images. This will take you to an explorer window. Find the images that you want as the main images on your home screen – select them (you can select one or many images – up to 5). Once you have uploaded an image, you have the option to delete it, or various editing options which are: crop, rotate and zoom.
Click here to see details of how to use the images editing options available
Add a company slogan – this field is mapped to the H2 header tag, which means that it helps SEO to pick up that content
Add a company message (mapped to H3 header tag)- this field has formatting options which allow you to format the text as required. You can also add hyperlinks to other web pages – either internal to this site or external links can be added
Lastly, add up to 3 images and descriptions to be displayed at the bottom of the home page. You could use these images to showcase products, people in the company, or even more information about your industry.


Set up the About Us page
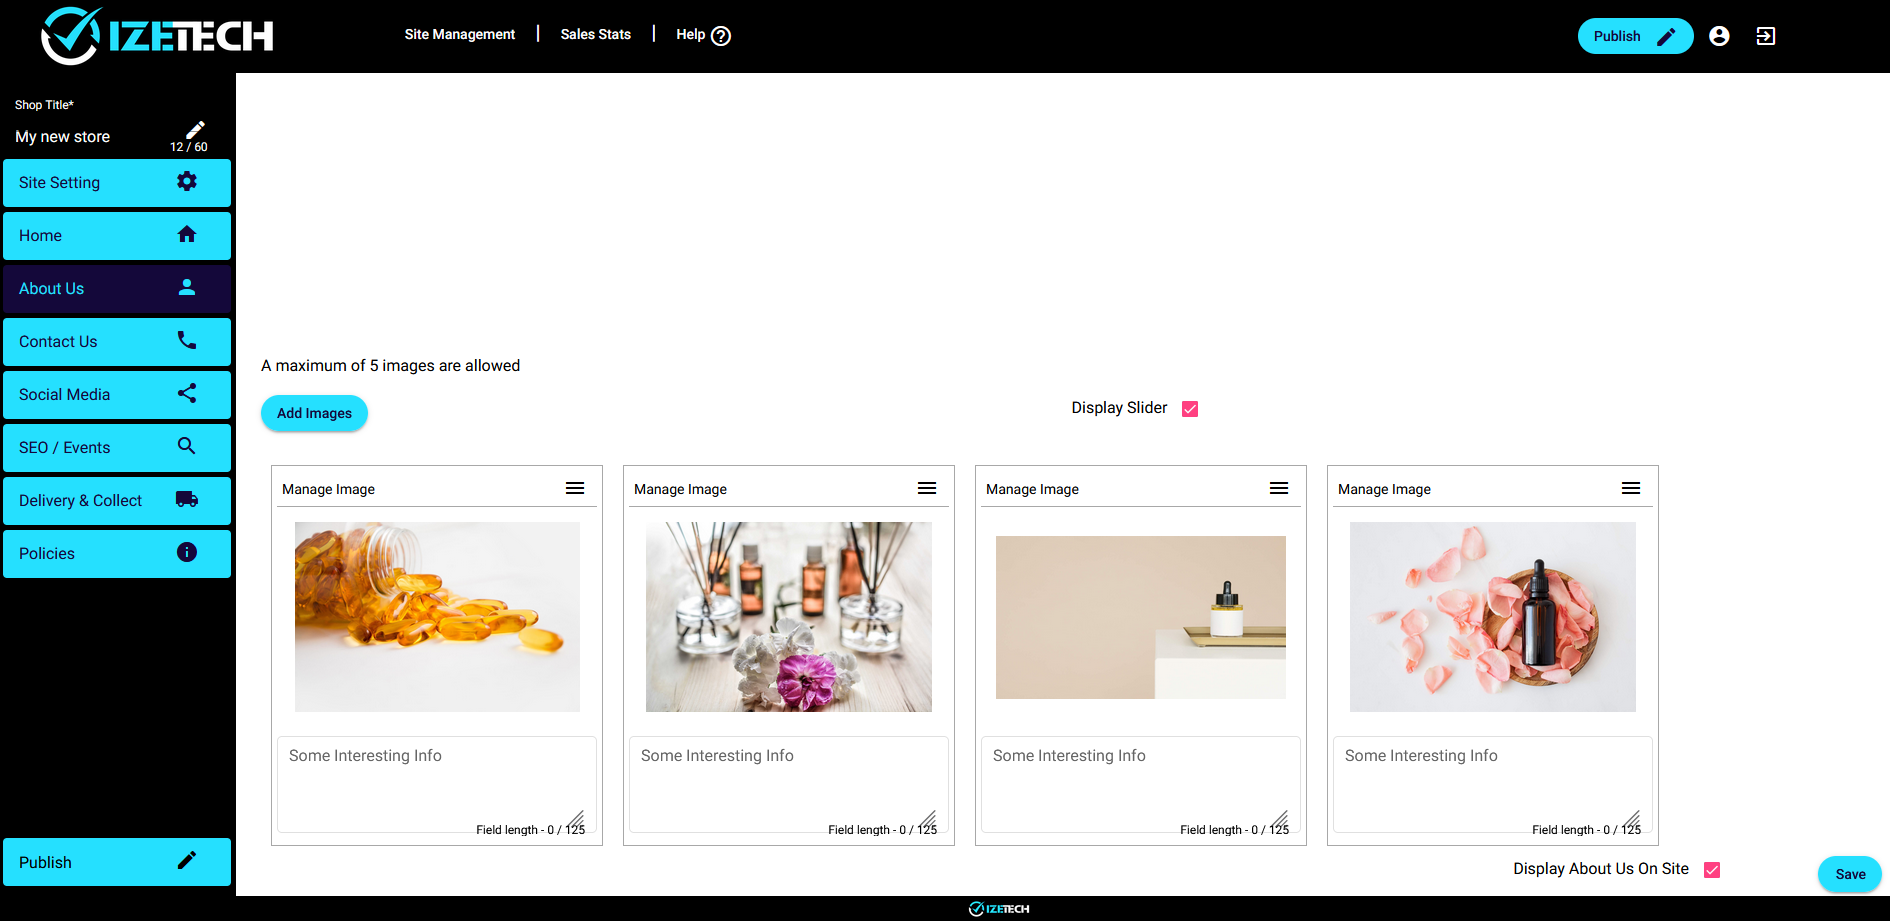
The about us page is an optional page within your site. There is an option to switch it on or off, simply by checking and unchecking the “Display about us on site” checkbox, found on the bottom right of the screen, next to the save button
This page gives you the ability to provide your customers some insight into your business.
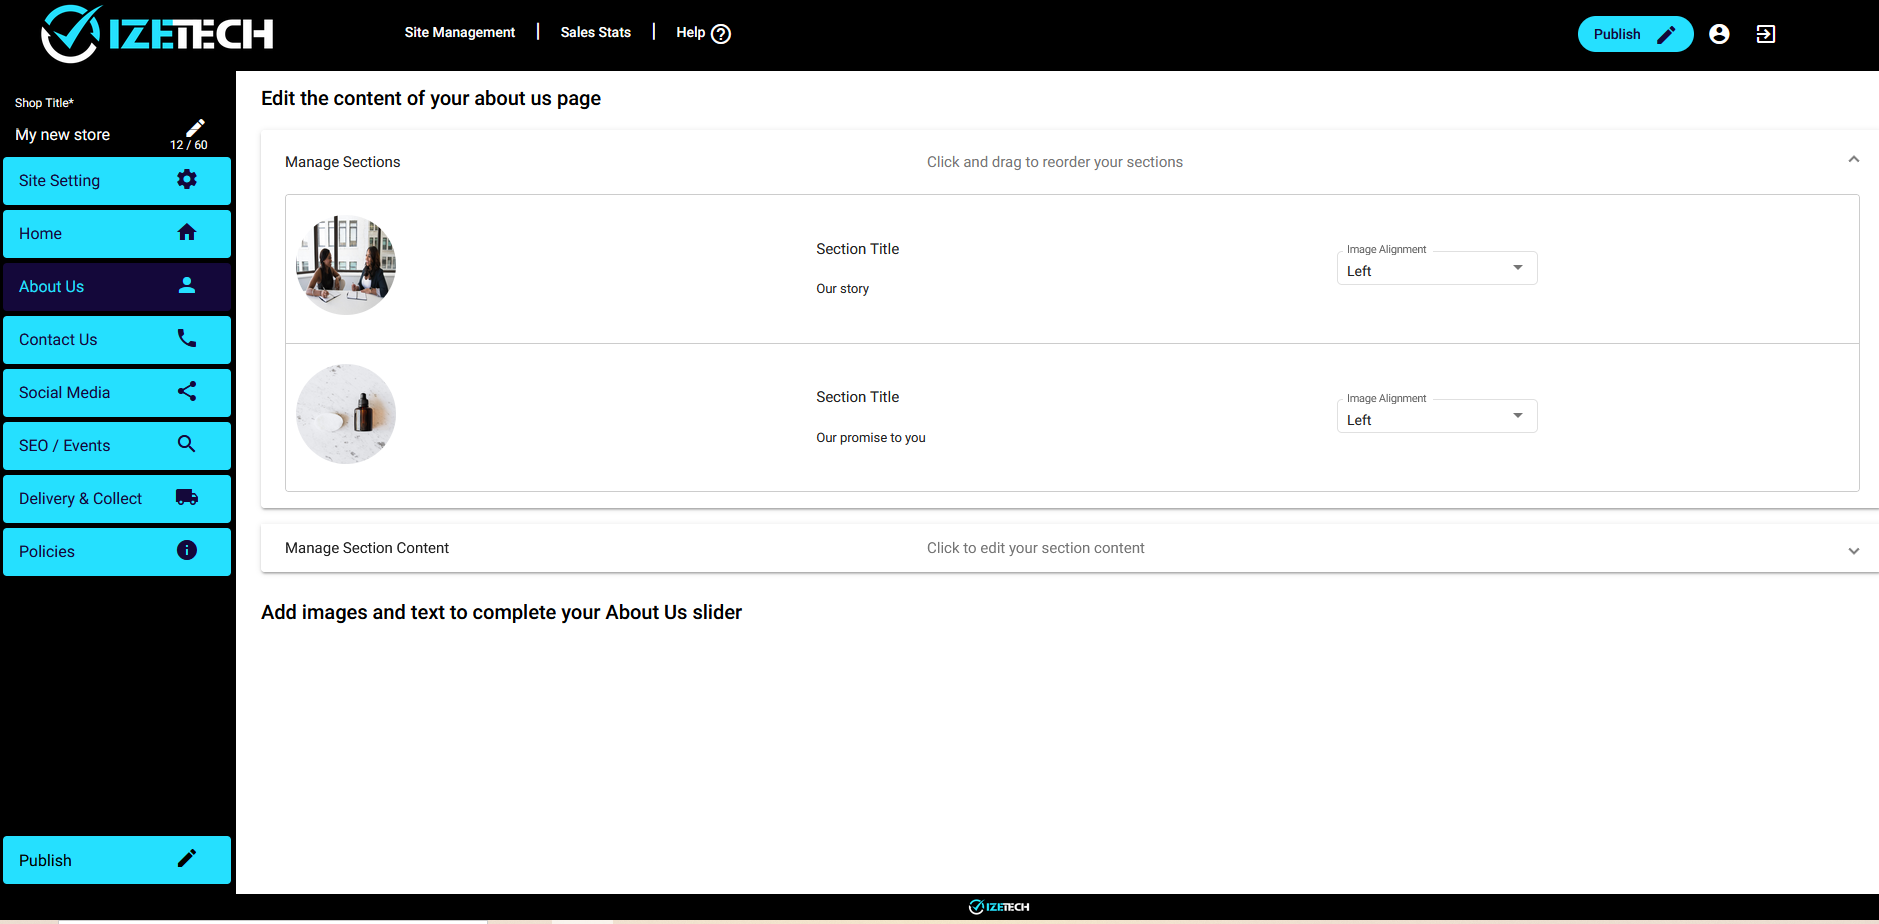
The about us page design consists of multiple sections consisting of a heading, image and description. There are also 5 optional footer images with descriptions.


You can add one or more sections, which could contain details about your company, your staff, your products, or anything related to your industry. Expand the “Manage section content” bar to start adding content.
Start adding the information that you want displayed on your page. Add a title, an image and a longer description.
Click on the ‘Add section’ button to add another section. You can add as many sections as you’d like.
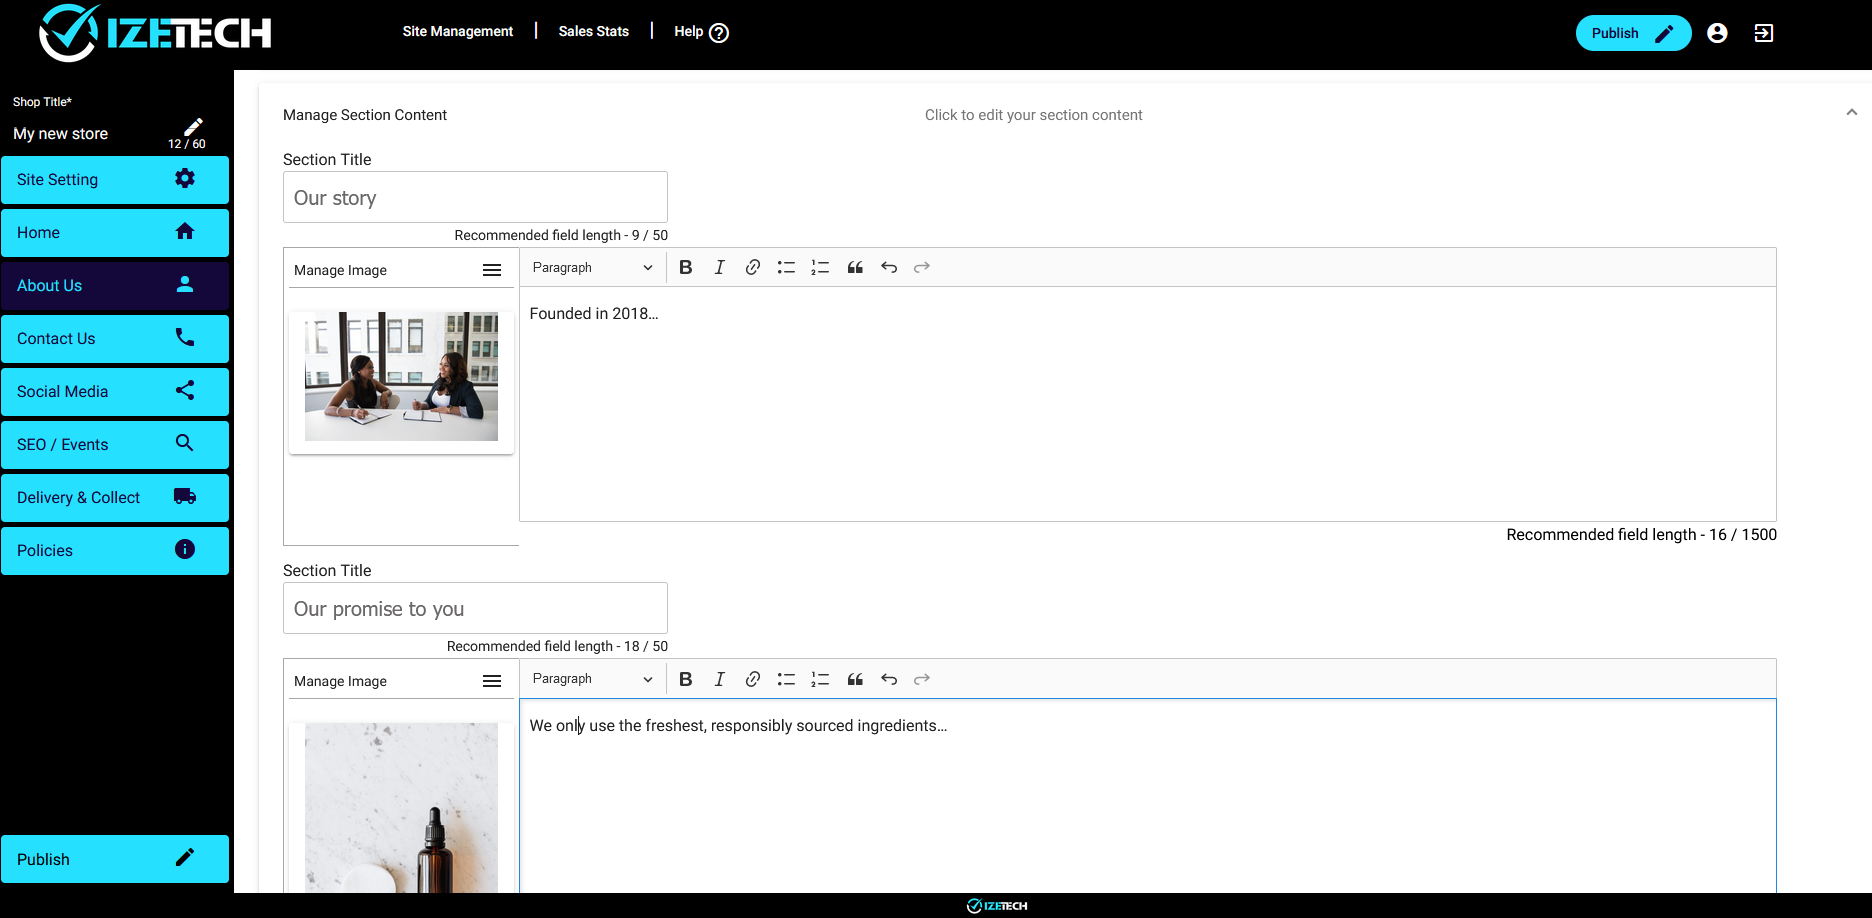


Each section can have the image aligned to the left or right. Expand the ‘Manage section’ bar, which will allow you to set the alignment per section. Sections can also be re-arranged – click on a section and drag it to the desired position.


Lastly, add up to 5 images and descriptions to be displayed at the bottom of the page. You could use these images to showcase products, people in the company, or even more information about your industry. Click on ‘Add images’, then select the images to upload. Use the ‘Display slider’ checkbox to switch on or of the display of these images on the about us page


Set up your contact us page
The contact us page is used to show your contact details to your customers or potential customers so that they know how to contact you
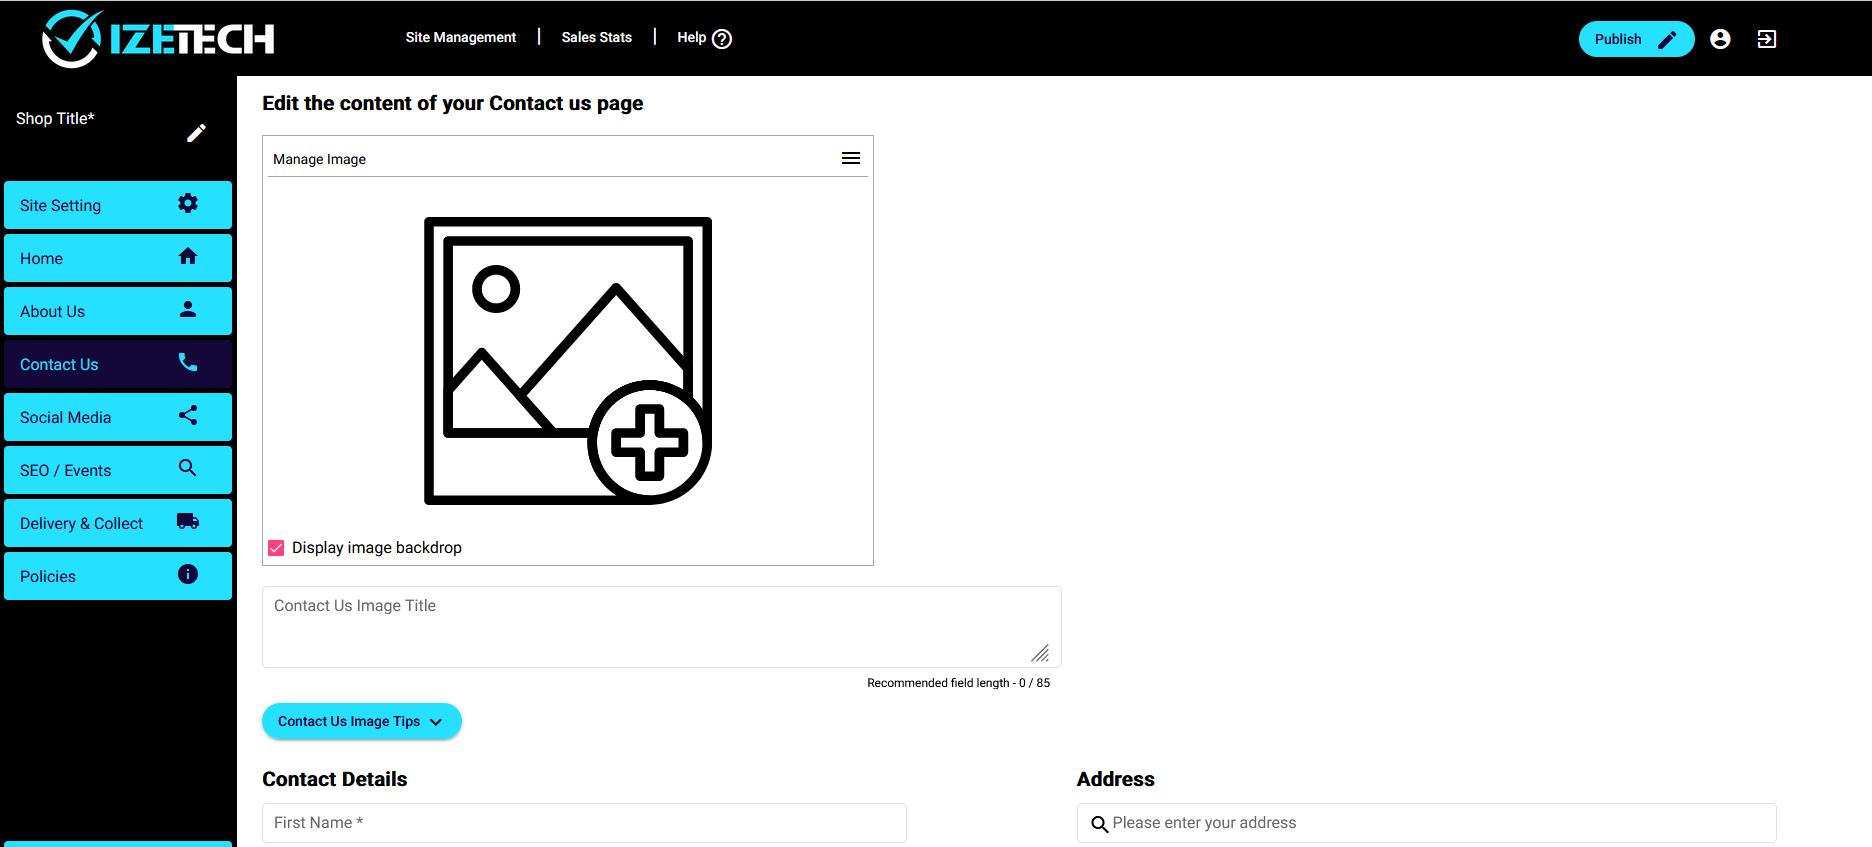
Click on the image placeholder to add an image. This will take you to an explorer window – find the image that you want as the image on your contact us screen.
Then, add your contact details – your name, phone number and email address
Add in your company address – you can search for your address by typing in the start of your street address and selecting the correct address from the suggestions. If you don’t want to publish your address, you can just type in your town or suburb


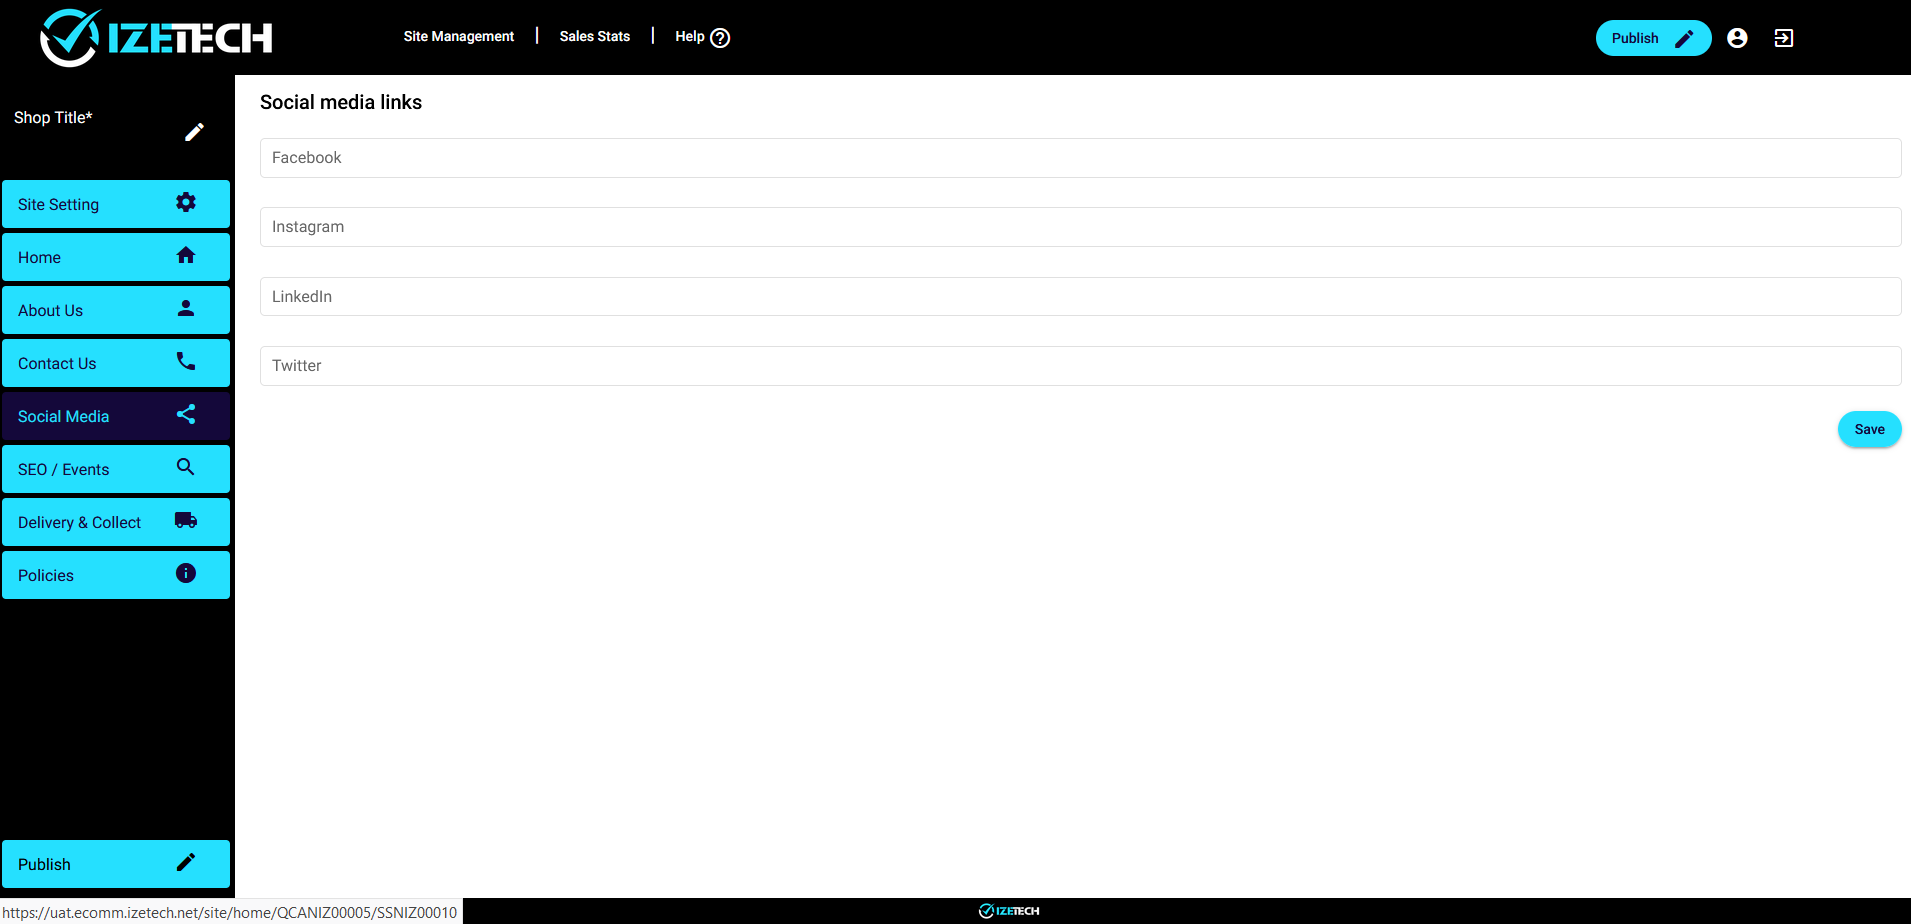
You can add links to your social media pages – these will appear on the footer (bottom) of your website.
Go to your Facebook page and copy the URL – you will find this in the web address bar at the top of the browser page – it will look something like this: https://www.facebook.com/mybusinesspage
Paste the URL into the Facebook field
Repeat this for Instagram, LinkedIn and Twitter – note that all of these are optional, you only need to fill in the ones you use


Set up your SEO and Events
You can add your Facebook pixel and Google analytics account details so that these apps can track your website visits
For information about setting up google analytics, visit https://marketingplatform.google.com/about/analytics/
For information on how to set u your Facebook pixel, visit https://www.facebook.com/business/help/314143995668266?id=1205376682832142
You can also add a site description and SEO keywords that will be added to your site metadata in order to assist with SEO – this helps potential clients find you on Google. You can add up to 30 keywords


Set up your shipping options
Before you can publish your store for the first time, you will need to set up your shipping options.
Shipping options are simply the way the your customers can receive your product – will you deliver, or will the customer collect? Or will you give your customer the option? You can set this up by selecting the ‘Delivery and collect’ option on the left hand side menu.
If there are many locations where your customers can collect their goods, you will add multiple collection points.
If you only offer delivery, you will set this up once only.
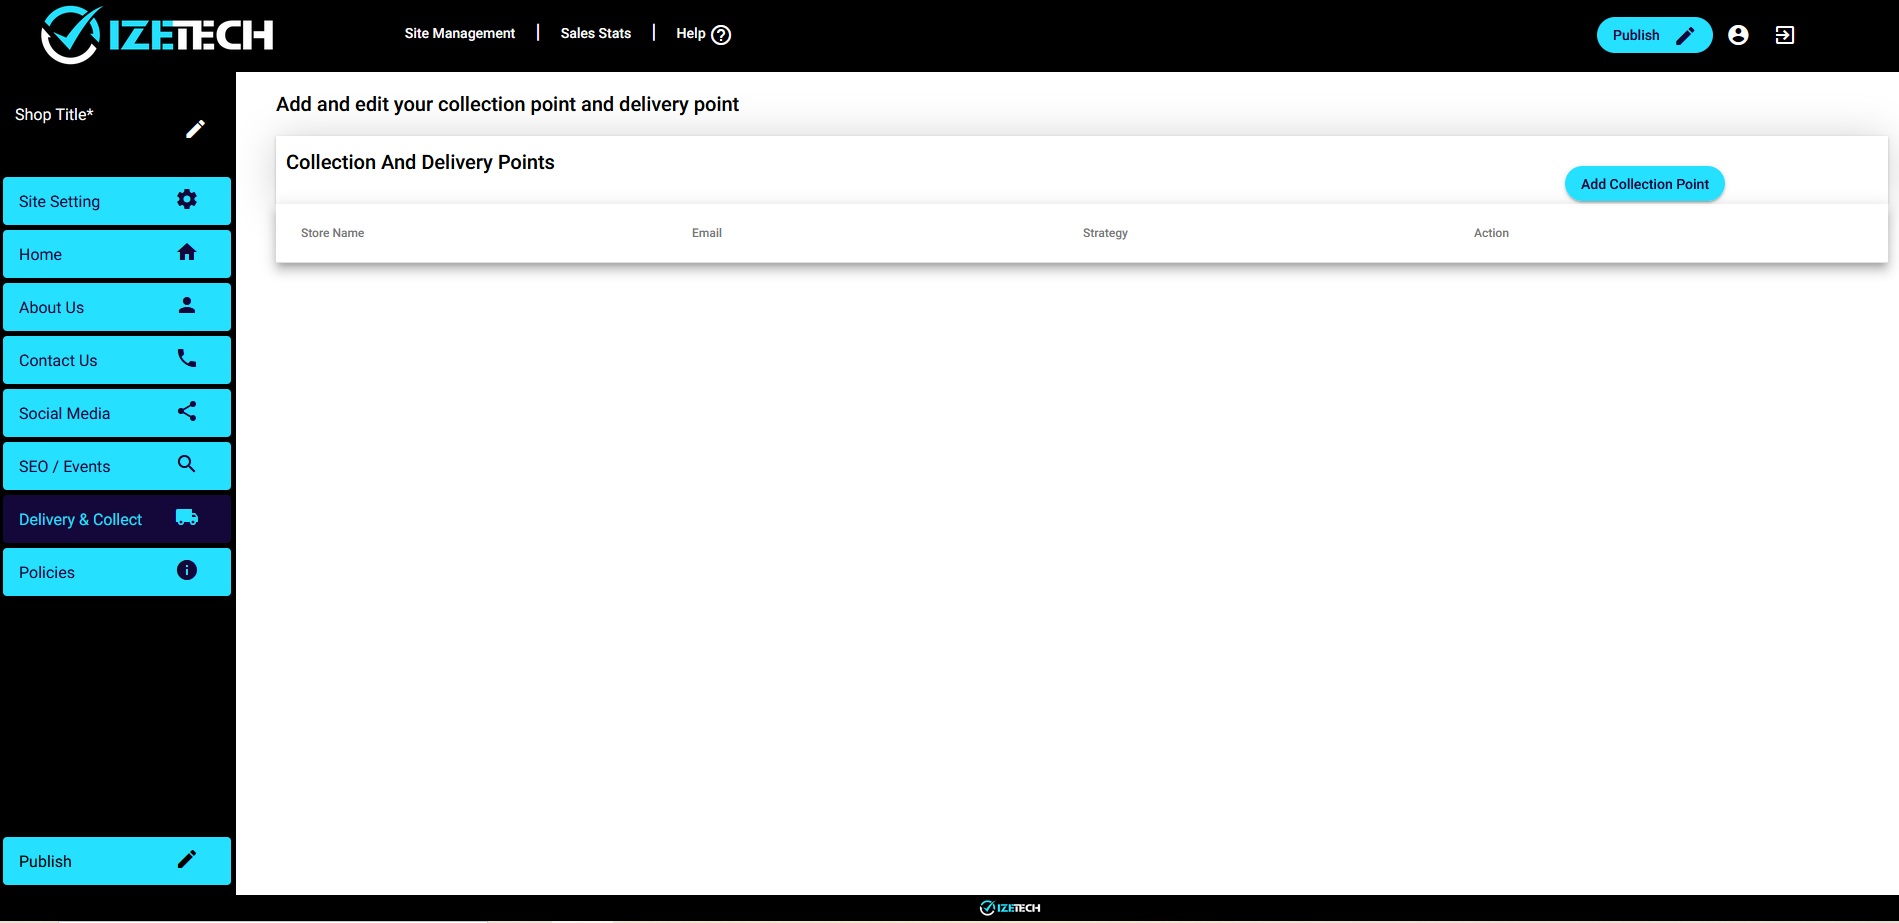
When you first go to this tab, you will see an empty list. Click on ‘Add collection point’


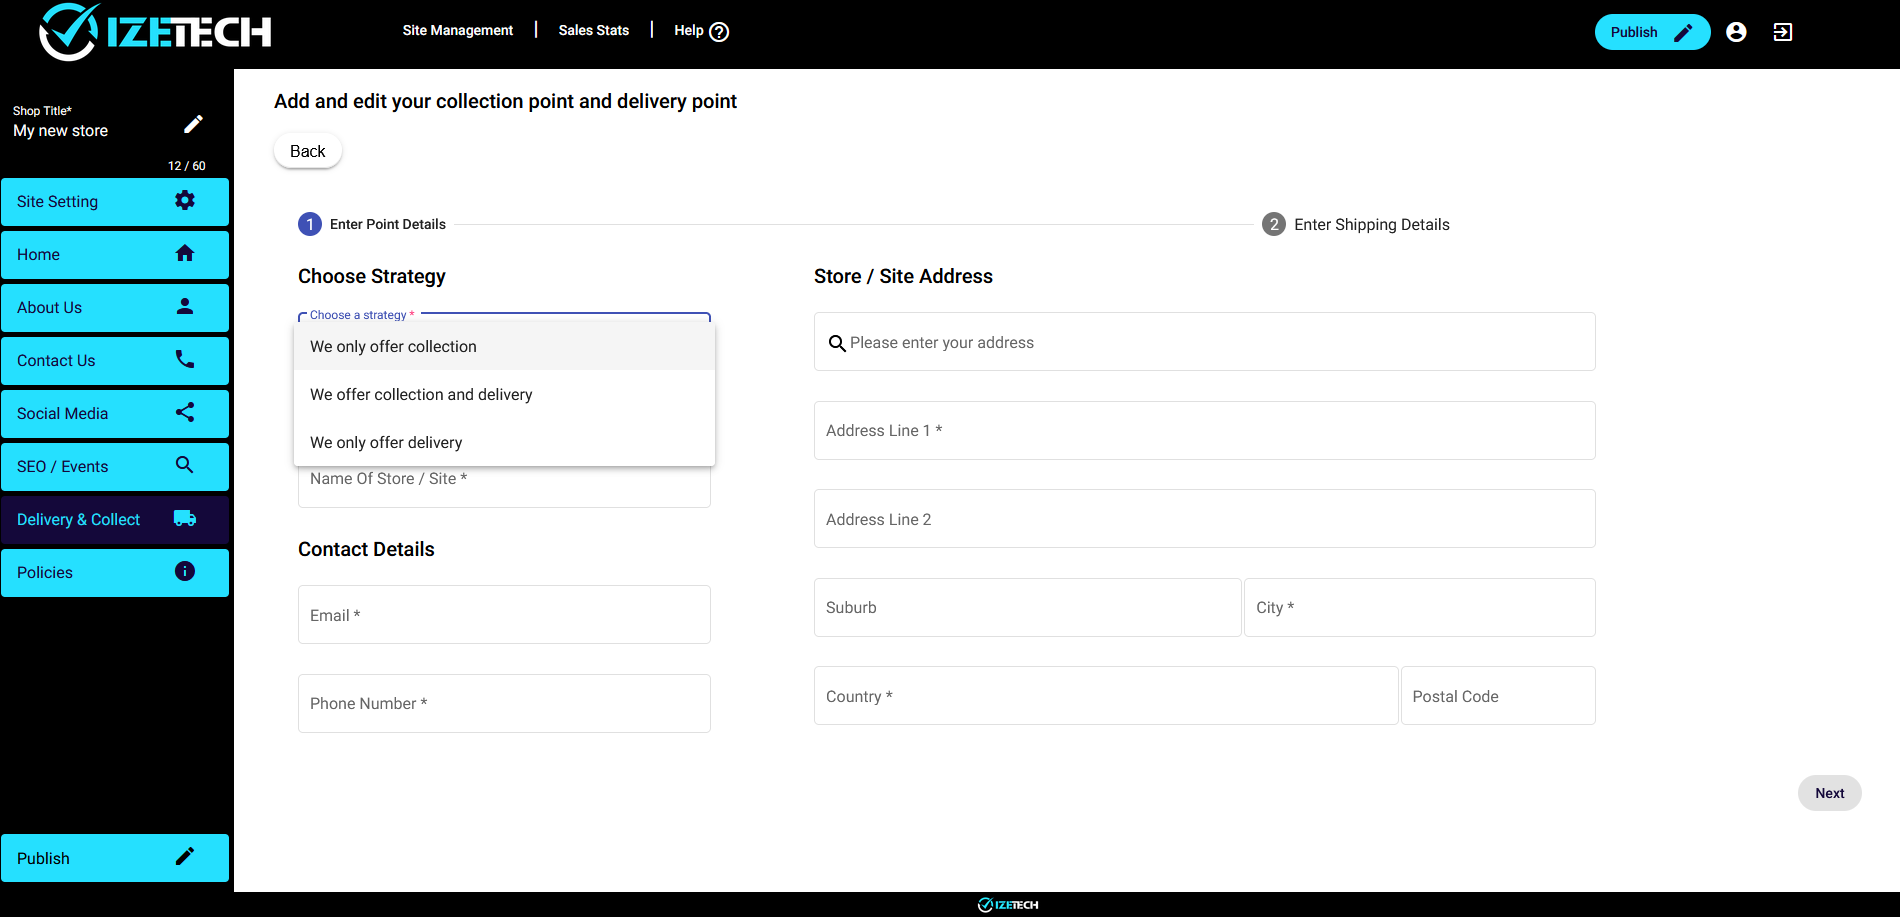
First select your delivery strategy – do you offer deliveries only, or collections only, or both deliveries and collections
If you offer both collections and delivery, set up the first collection point together with the delivery by selecting ‘We offer collection and delivery’.


Now fill in the contact information for this collection/delivery point. This information will be printed on the order summary that gets emailed to your customer when they have made a purchase.
Give the point a unique name so that you can easily identify it, should you need to edit the details in the future.
Add the address of this point – if it is a collection point, this address will be displayed to your customer on checkout, and will also be emailed to them once the purchase is complete. If this point is a delivery point, this is the address that will be used as the start destination to calculate the route to be taken in order to deliver the goods.
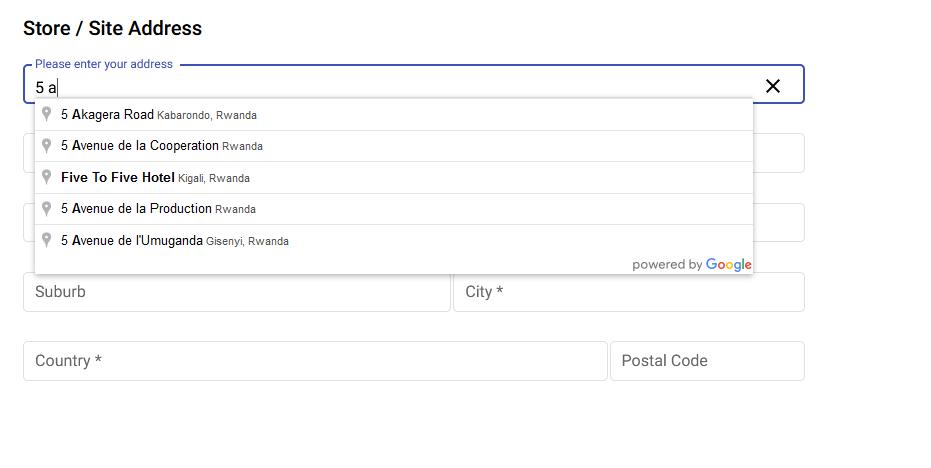
You can type in your address manually, or search for it in the search box. Type in the first few details of the address and select the correct one from the suggested addresses displayed. The selected address will then be filled into the fields below.
When you are satisfied that your contact details and address are correct, click Next


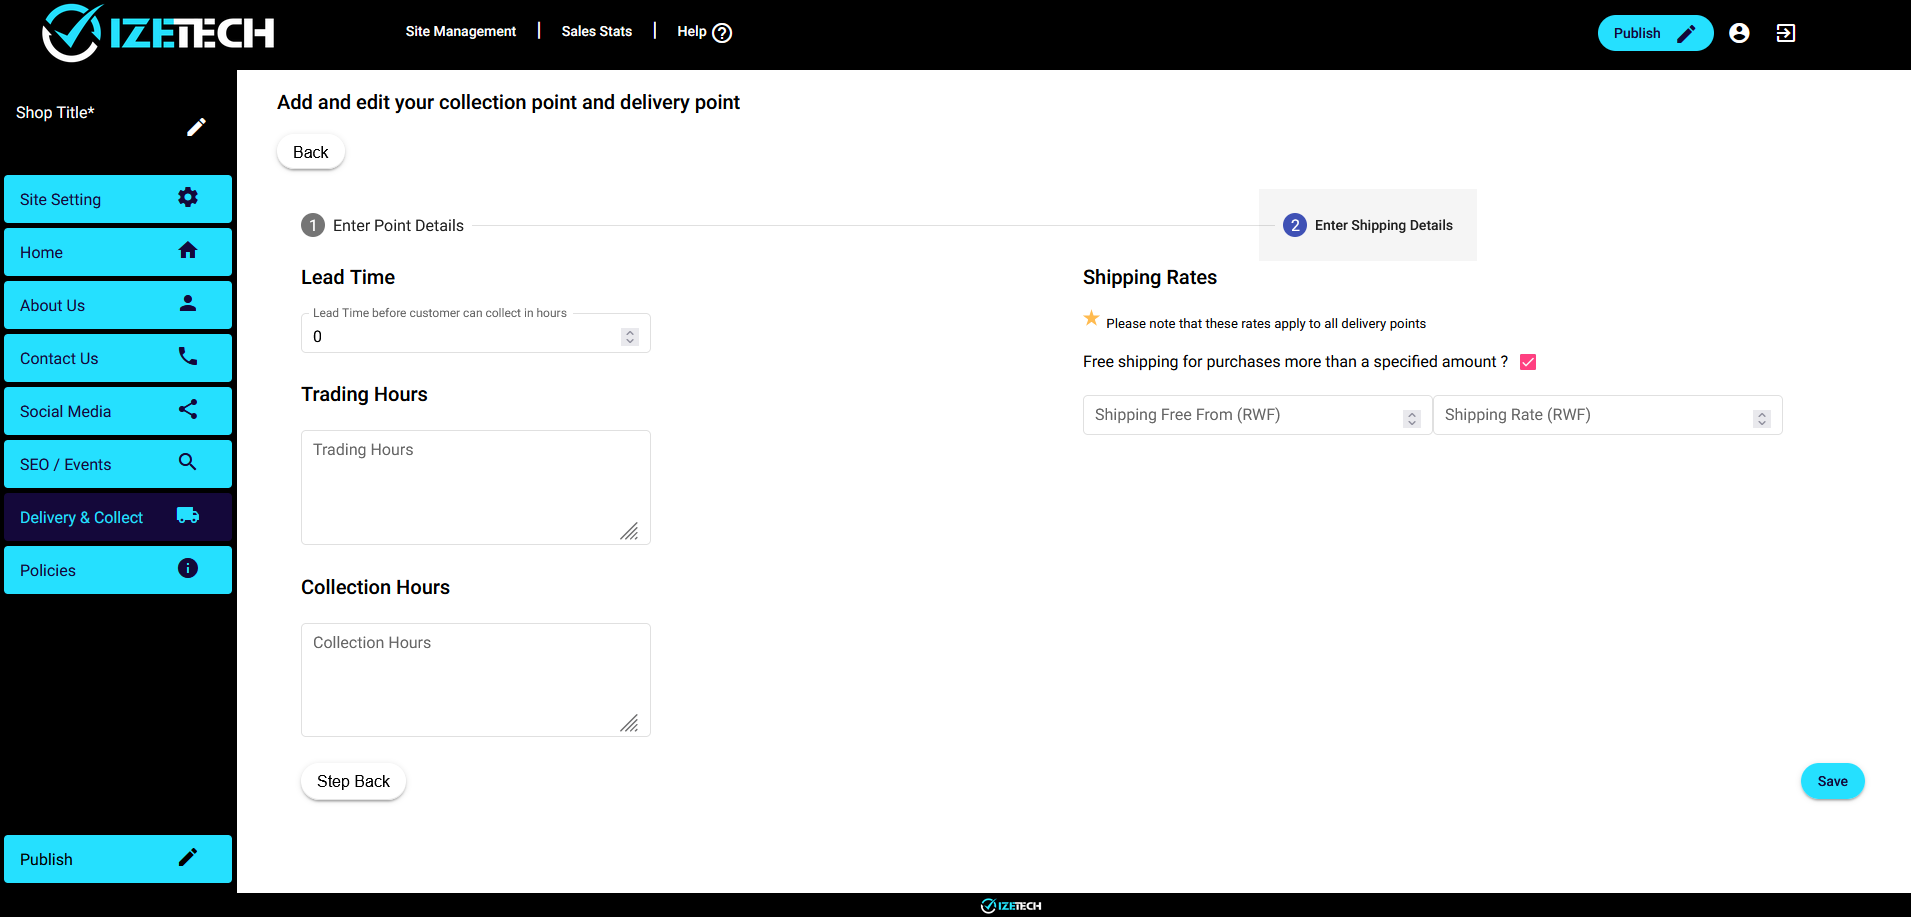
Now fill in your lead time, trading hours and collection hours. All of these details are optional – the collection hours will be displayed to your customer on the checkout process when this collection point is selected
If this point is a delivery point, you will also capture your shipping rate and the limit at which deliveries become free. Both of these details are optional.
The shipping rate is the flat fee that is charged for a delivery. This amount will be added to the amount due on checkout automatically
The shipping free from amount is the amount that a customer has to spend in order to qualify for free delivery. Once the purchase is above this amount, the delivery charge will be zero. If it’s below this amount, the delivery fee will be added to the amount due. If you charge for all deliveries, regardless of the amount spent, leave this value at zero


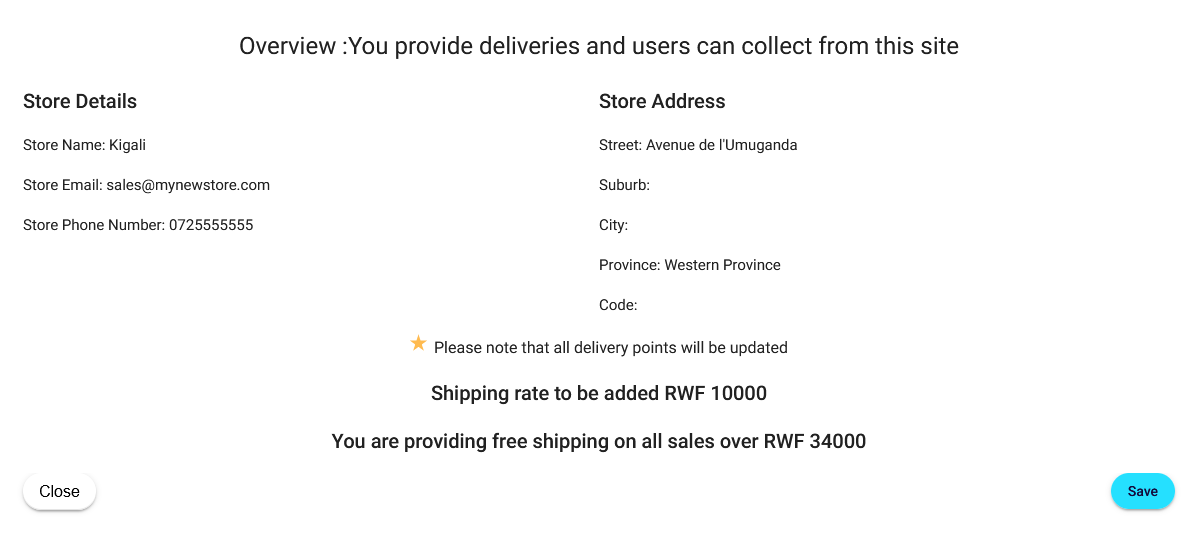
A confirmation screen will now display, where you can check and confirm the details you have captured.
Click Save to save these details, or Close to change the details


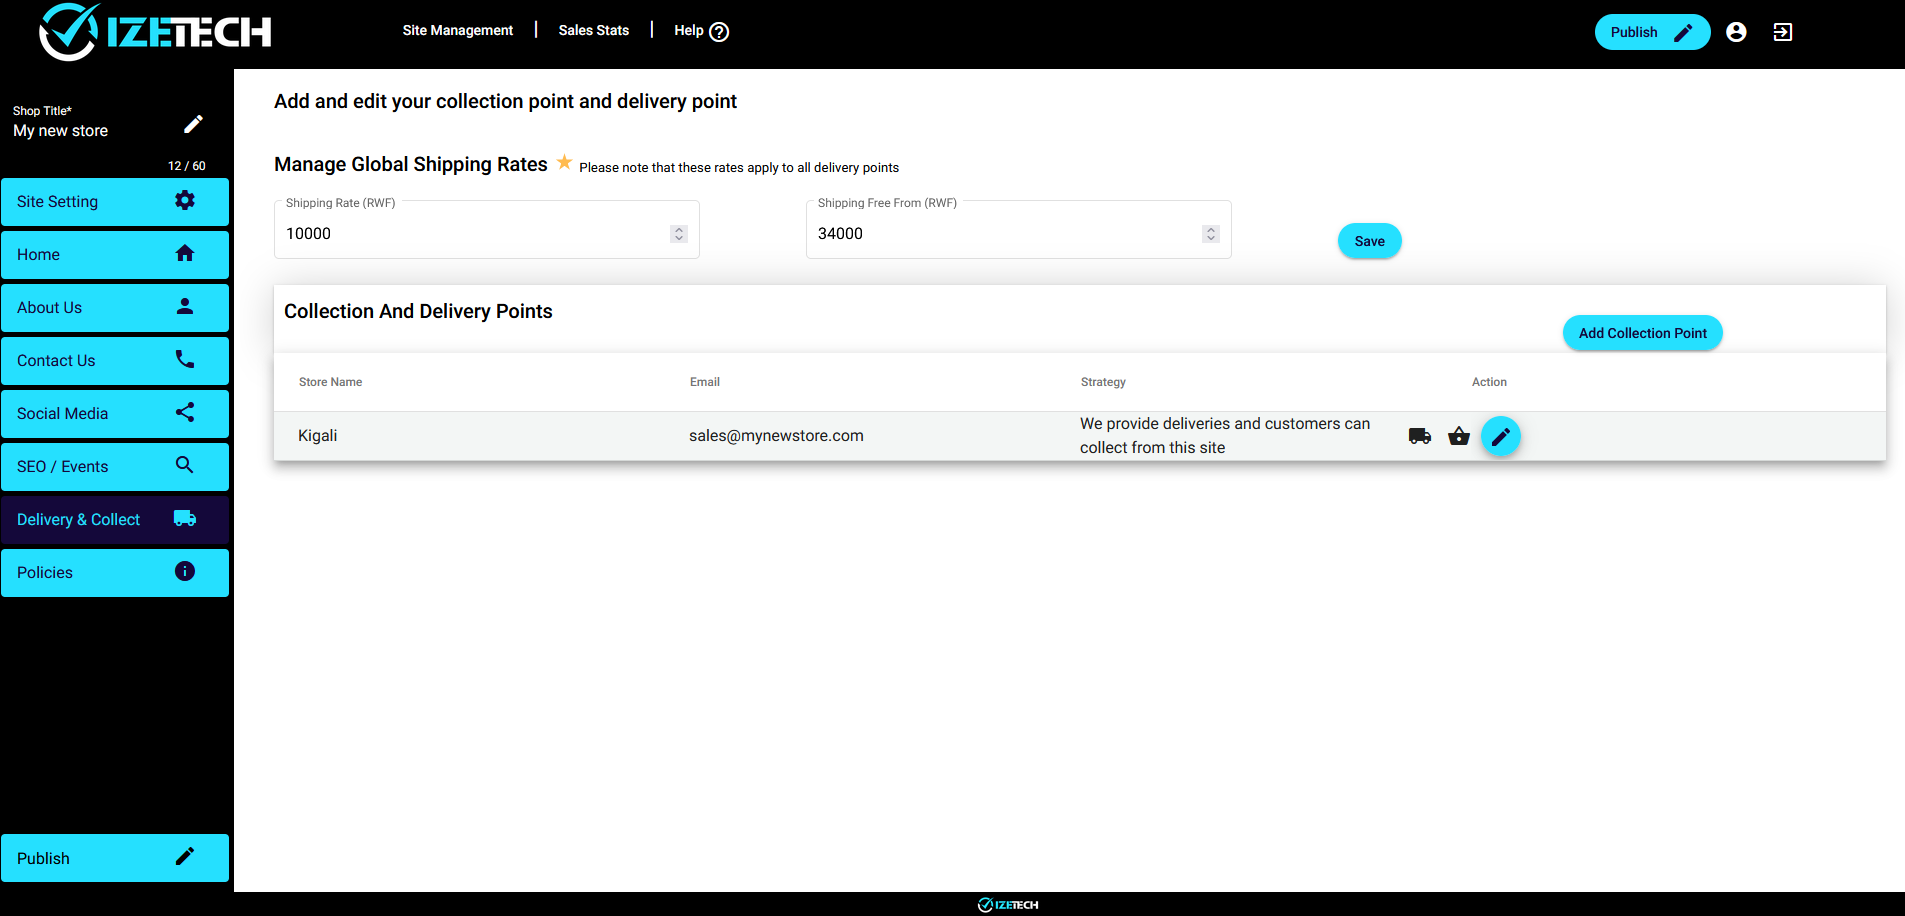
Once you have saved your collection/delivery point, it will display in a list. Your delivery fee and free delivery threshold amount will be displayed above the list, and you can edit and save these values.
You can add additional collection points if you have them, by clicking on “Add collection point”
You can also edit the details of any collection point by clicking the edit button at the far right of the collection point in the list


Set up your Policies
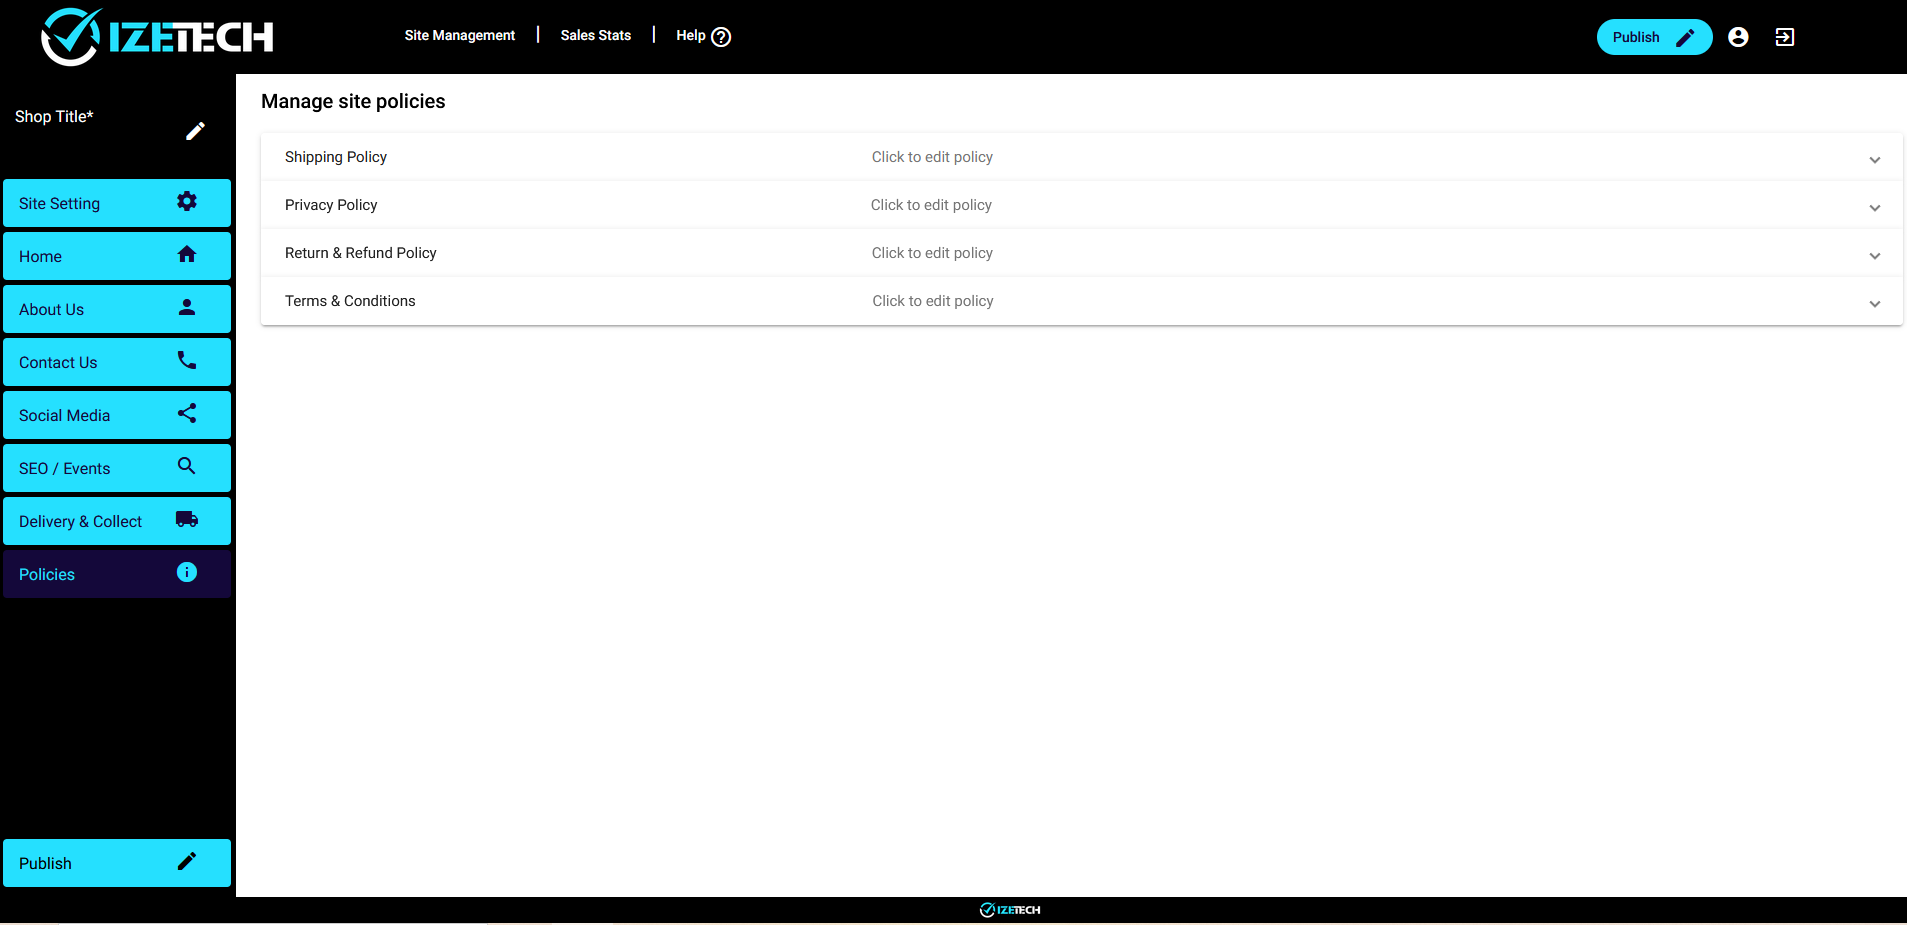
You can add all of your company policies and terms and conditions in order for them to display on your website. These include:
Shipping policy
Privacy policy
Return and refund policy
Terms and conditions


Publish your store
Once you are ready with everything you have set up, and want to make your online store live (visible and available to anyone on the internet), you can publish your changes.
There is a publish button on the bottom left of your screen, and also the top right of your screen.
Note that you will not be able to publish until you have captured your store name, and at least 1 shipping option – the checkout process needs to have at least one option for your customers to choose
The publish screen will display the URL of your store. This is the link of where people can find your store.
Click the publish button to start – it will take approximately 6 minutes to create your store


Publish progress
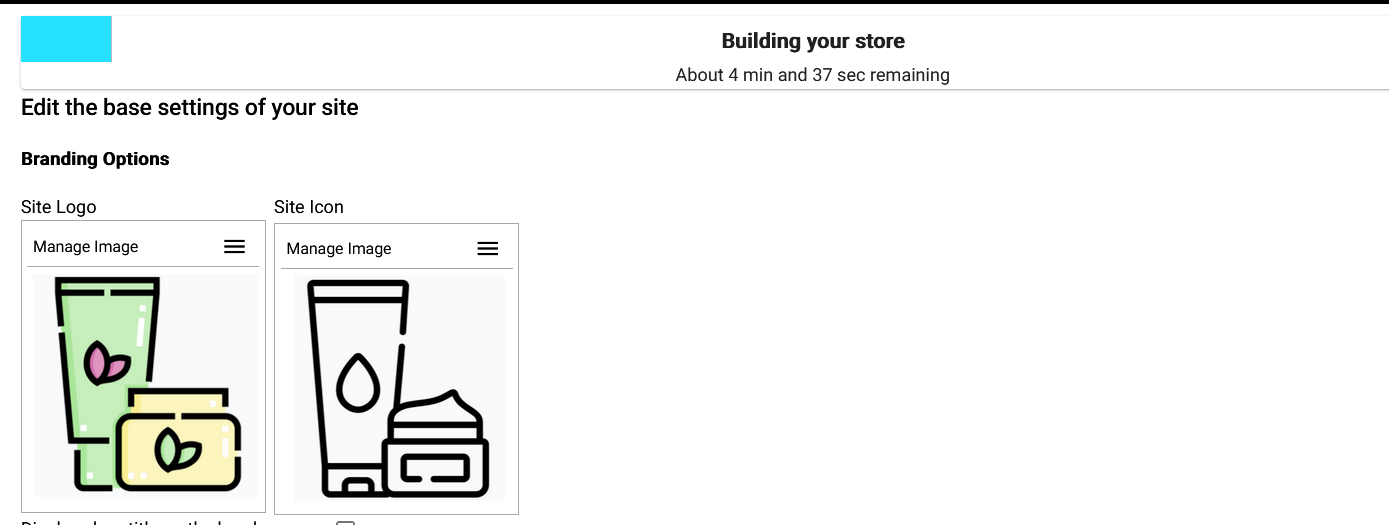
Once you have started publishing your store, you can view the progress by clicking on Site Settings.
You’ll see a progress bar, showing you how much time is left to complete


Set up your social media links