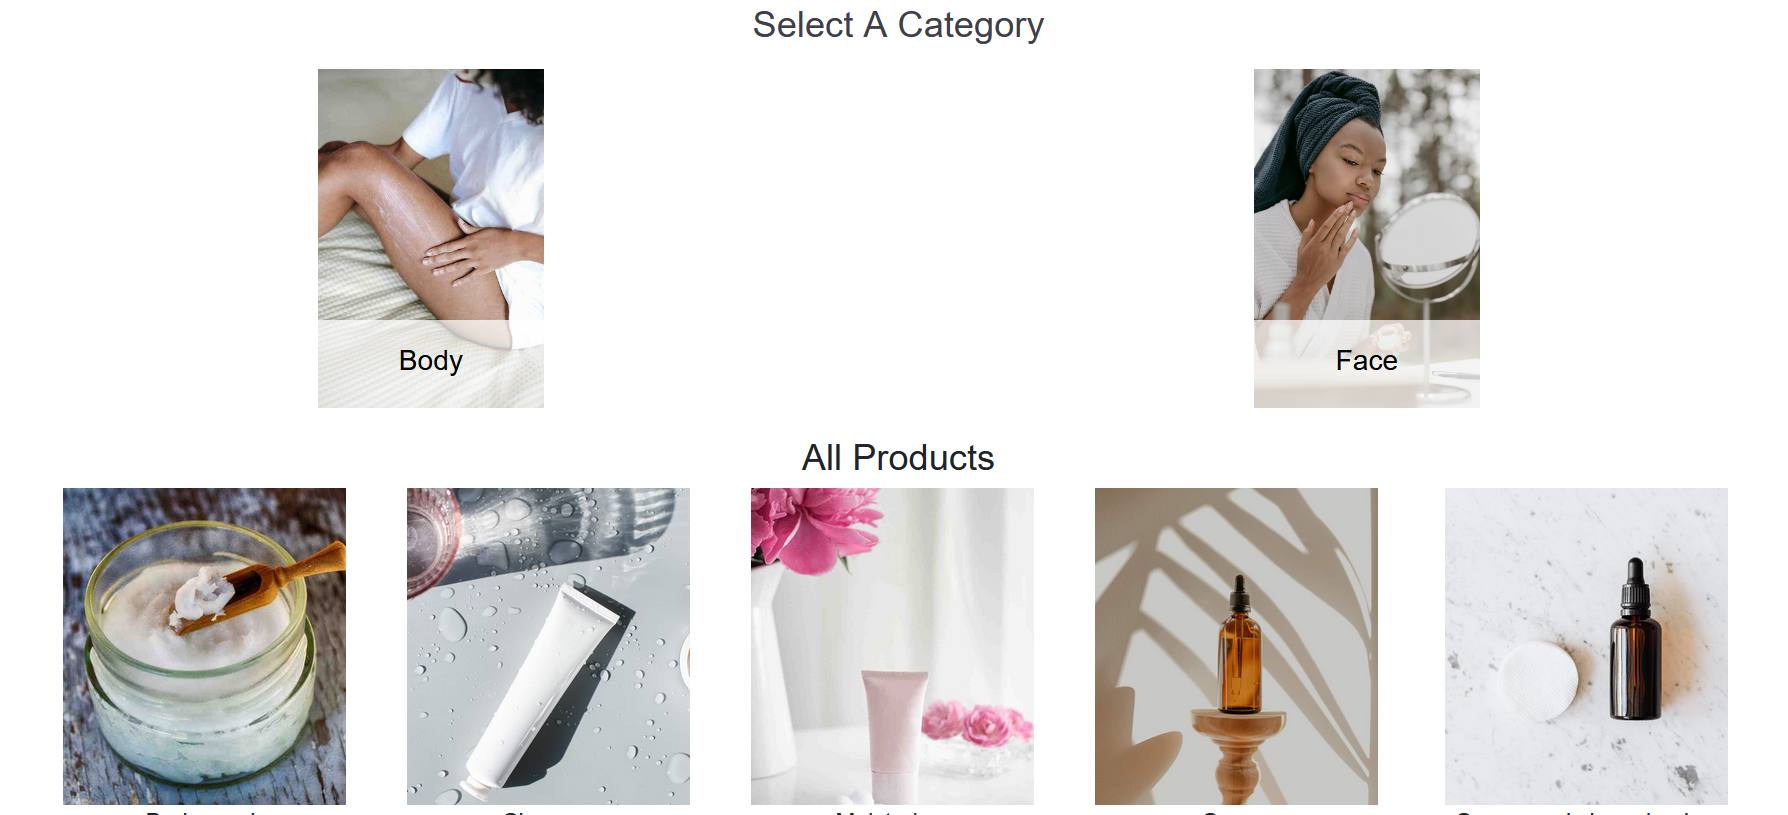
How to load products on your online store
Get prepared
Get great photos of your products. Style your products, set up good lighting and take photos – if possible, get professional photos done. The better the quality of photos, the more appealing your products will be to your clients
Give each product a name; and write up a detailed description of the product. What are the common questions you get asked about your products? These details could make up the detailed description


Log into the shop management console
Log into your store management console using your email address and password. You can access it here:
https://ecomm.izetech.net/auth/login
If you can’t remember your password, click on the “Forgot your password” link. This will email a code to your Izetech registered email address, and guide you through the process to reset your password


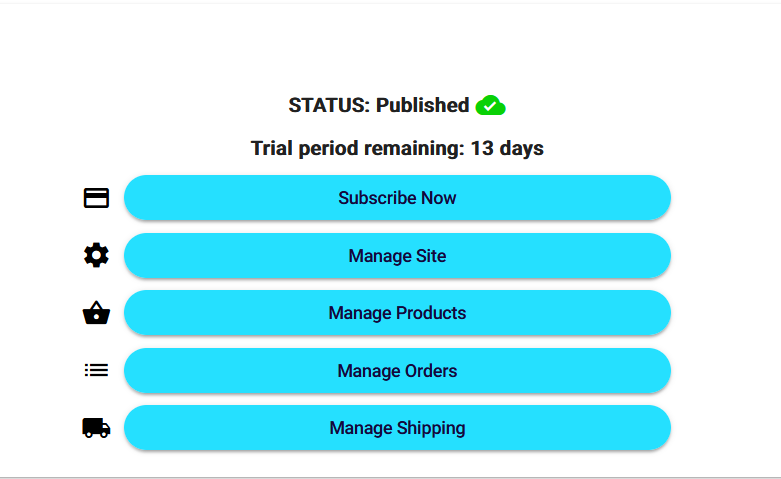
Once you are logged in, you’ll see a menu. The number of days left in your free trial is displayed above the menu. Once the free trial has expired after 14 days, you can click on the ‘Subscribe now’ button to start paying your subscription.
To start setting up your products, click on “Manage Products”. This will take you to the product setup module


Set up your products
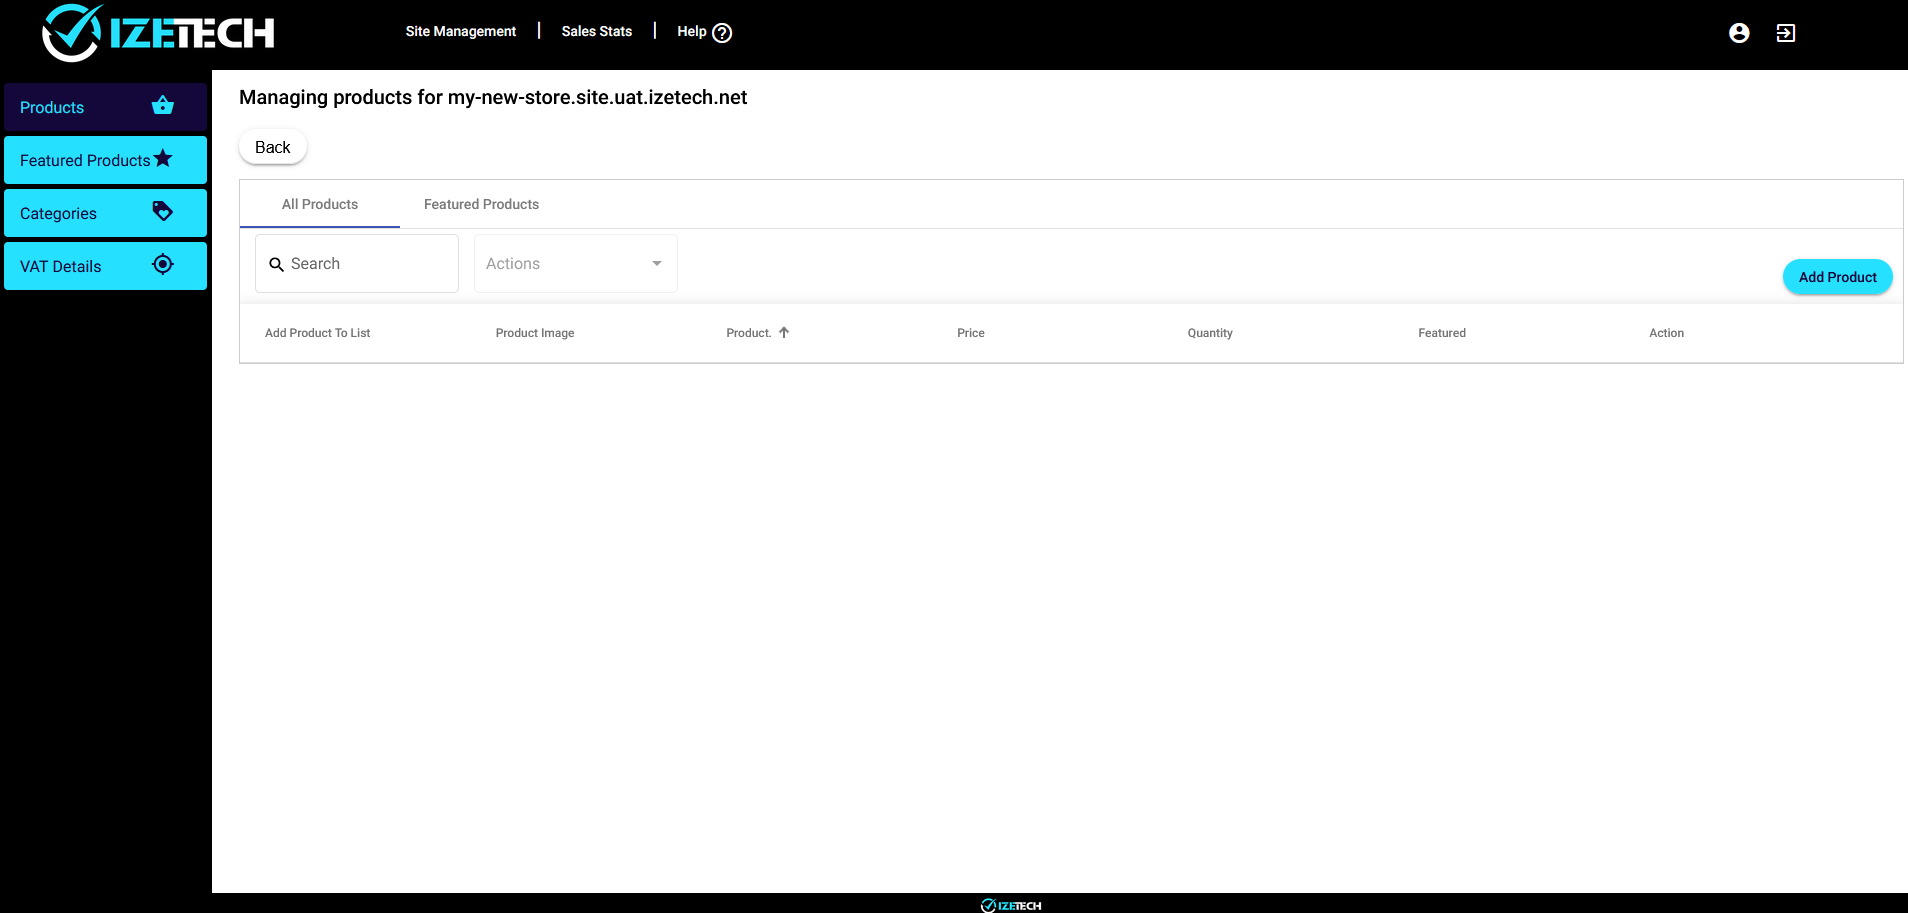
Products are the individual items that will be listed on your online store for sale.
If you have loaded products before, you’ll see them here. Click “Add product” to create a new product


Add a product
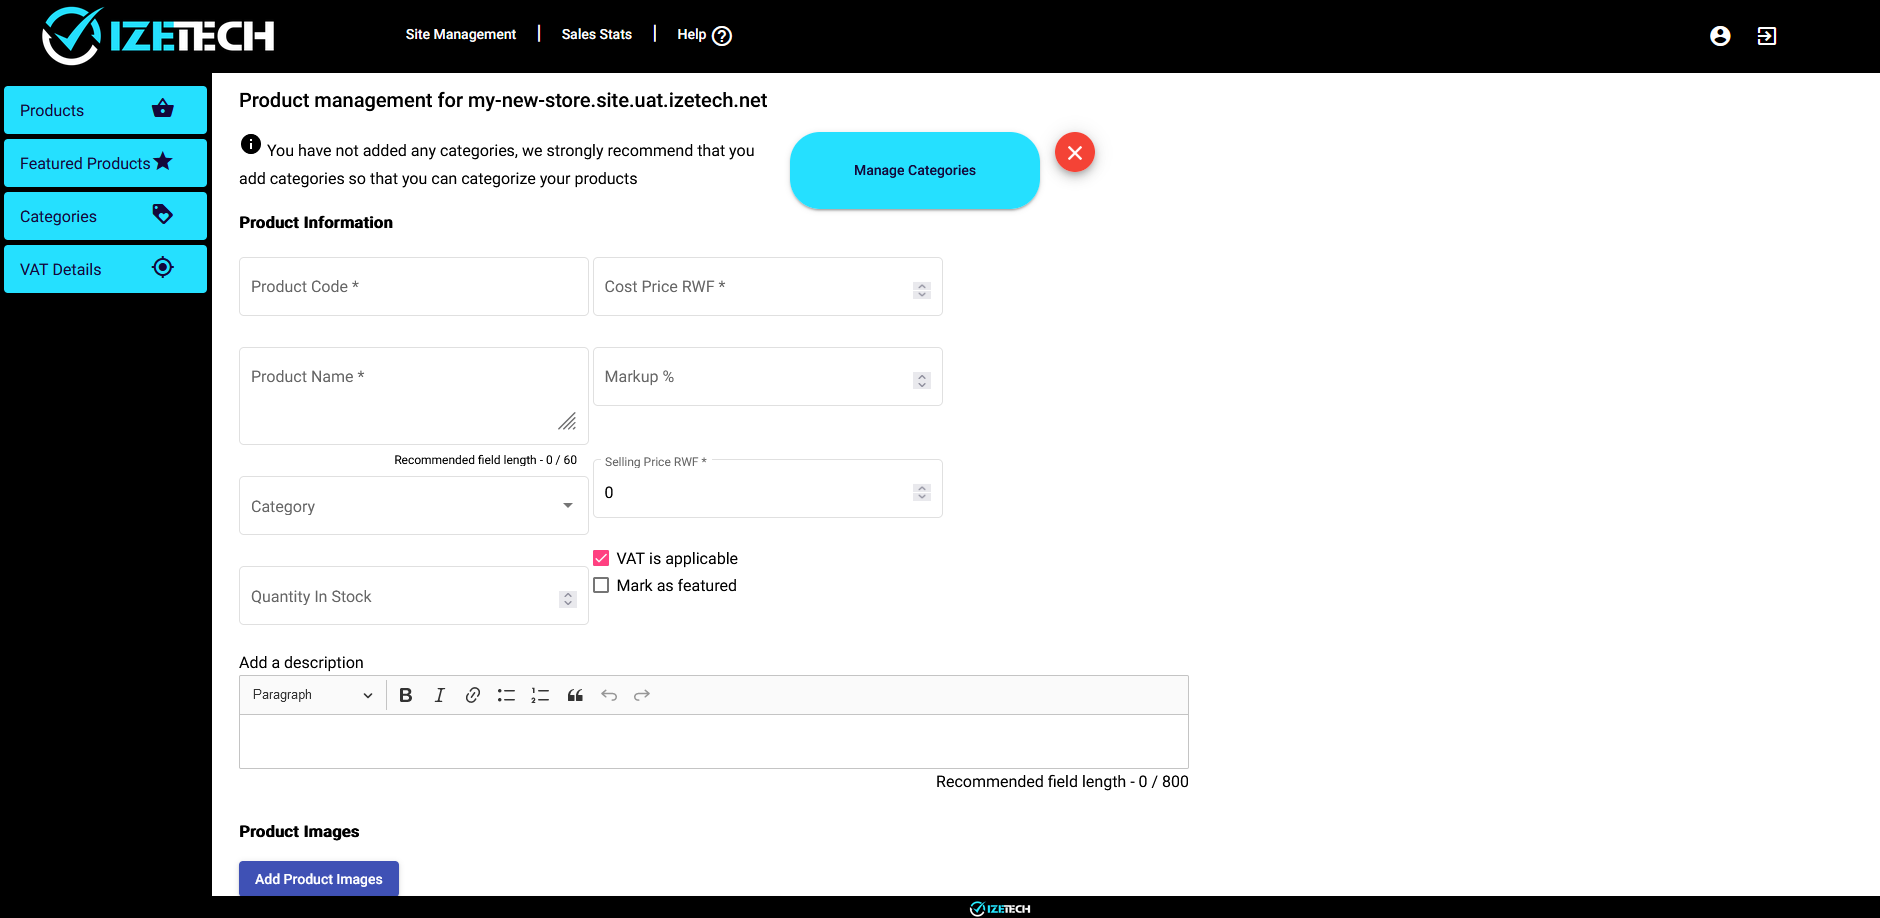
Note that there are some mandatory fields for a product – these are marked with an asterix *. These fields are necessary for your online store to work correctly, and you will not be able to save the product unless these are filled in.
Type in a unique product code for your product.
Add a product name – this will be displayed on your shop page on your store. The product name will also form part of the product page URL, which helps with SEO.
If you have set up categories, you can select a category to link the product to, otherwise leave it blank.
Type in the quantity of stock that you have available (if relevant). This is not required, but each sale on your online store will reduce the quantity in stock on the product. Note that this informational only, and will not stop the sale of the product when the quantity reduces to zero. You can, however, mark the product as out of stock. This will display the product on the store with an out of stock banner, and customers will then not be able to add the product to the cart.
Type in a long description of the product – this will be displayed on the product’s page on your shop, and gives your customers more information about the product. The more detailed you are here, the less the need for customers to have to contact you for information, and potentially losing the sale.
When capturing prices – you have 2 options
Option 1 – Add a selling price only – that is the price that’s displayed on your store – in this case make the cost price and markup 0, and type in the selling price
Option 2 – Add a cost price and a markup %, which will calculate your selling price.
If you have the “VAT is applicable” box ticked, 18% VAT will automatically be added to the selling price
Click “Mark as featured” if this product should be one of the featured products. Featured product are displayed at the top of the store page on your shop, before all other products, and is a way to highlight certain products to your customers, for example new products, or products on sale


Adding product photos
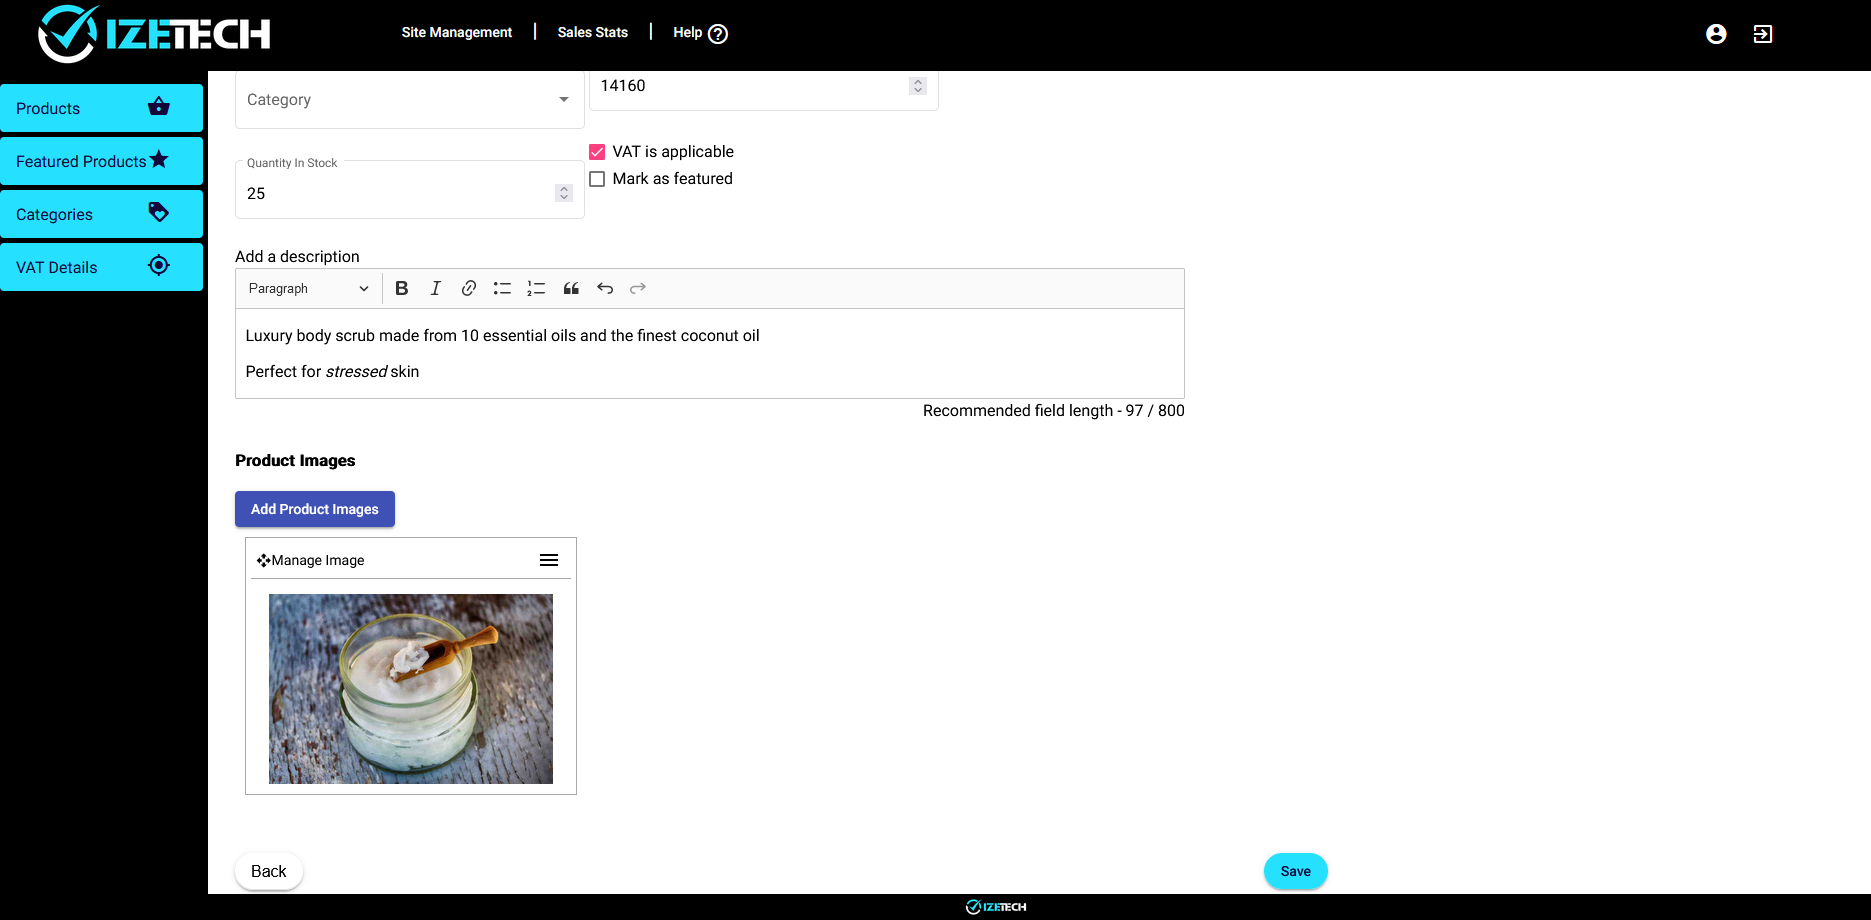
It’s important to add good quality photos to each product – these will be shown on your online store, and is what will attract customers and encourage them to buy your products
Click on “Add product Images” to add photos of your product – you can load up to 5 photos for each product. You will need to have the photos accessible on the device you are currently using. If you have used your phone to take product photos and you are using a laptop to set up your store, make sure the photos are saved to your laptop. An easy way to do this is to email the photos from your phone, and then save them on your laptop from the email.
Go to the folder where the photos are located, click on the photo, and then click “Open”. You can select multiple photos (up to 5) by clicking on the first image, then holding down the ctrl key and clicking on the next image


Cropping and changing your photos
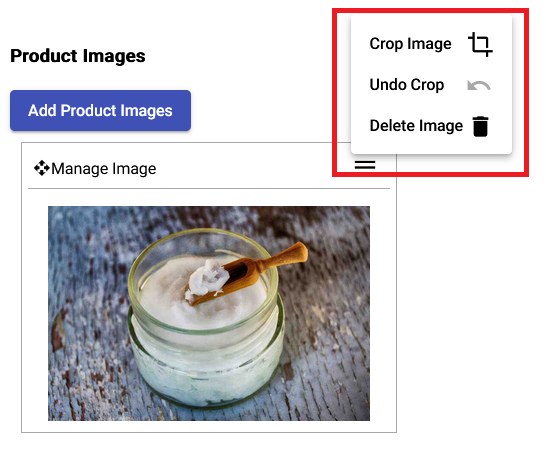
There are a few things that you can do once you have uploaded a photo. These are available on the popup menu:
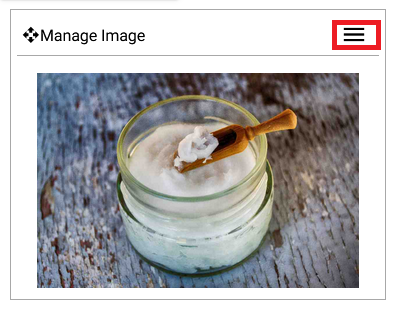
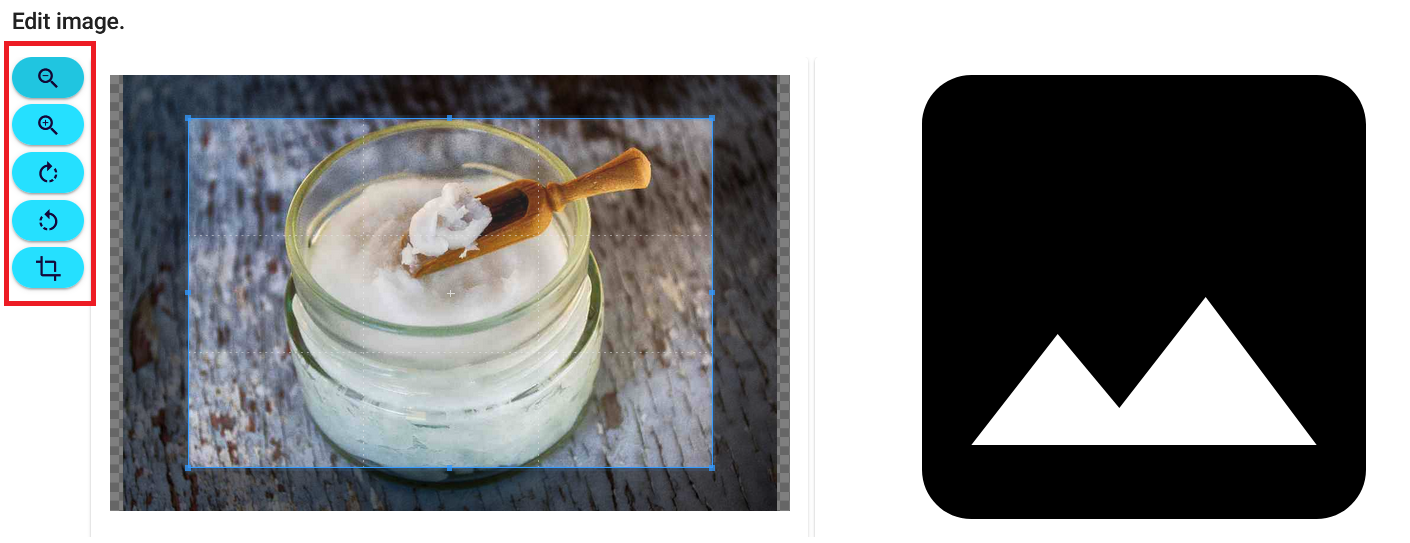
- You can zoom, rotate or crop each image by selecting the hamburger menu on the top right of each image, and then selecting “Crop image”
- You can undo any edits by selecting ‘Undo crop”
- You can also delete the image by selecting “Delete image”


Editing your photos
Click on the zoom in & out buttons to make the image bigger or smaller
Click on the rotate buttons to rotate the image to the right or left
Click on the crop button, and then drag the corners of the box displayed on the image to select where to crop the image. Then click the crop button again
Once you’re happy with the image, scroll down & click on the “Done” button


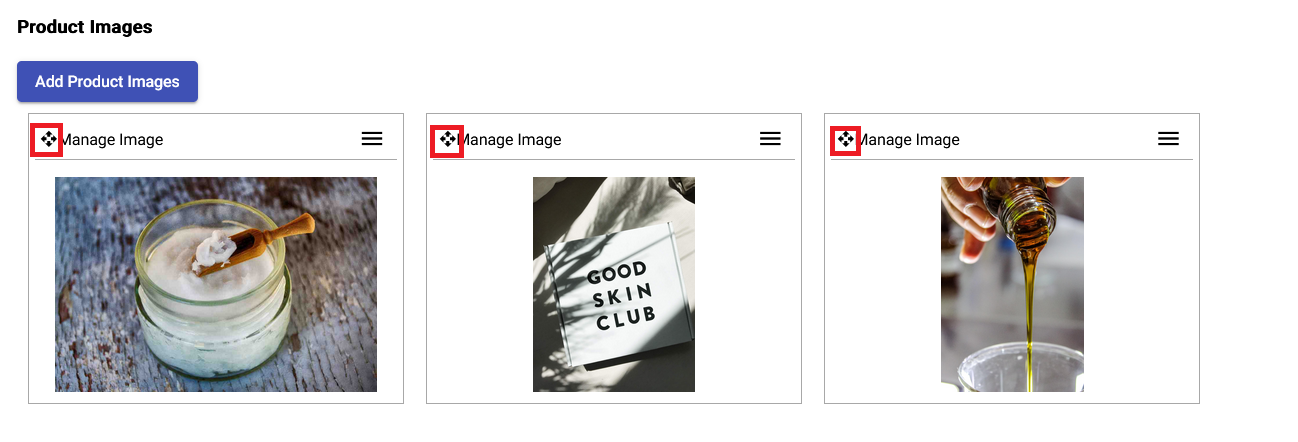
You can reorder the display sequence of the images by clicking the diamond image in the top left corner and dragging and dropping the images to the order you prefer. The first image will be the one that will display on your shop page on your store


Save the product
Click on “Save”, and your product will immediately be created on your store, and will be available for your customers to purchase. There is no need to publish in order for your products to be live on your store
Alternatively, press “Back” to go back to the product list without saving your changes


Edit or delete a product
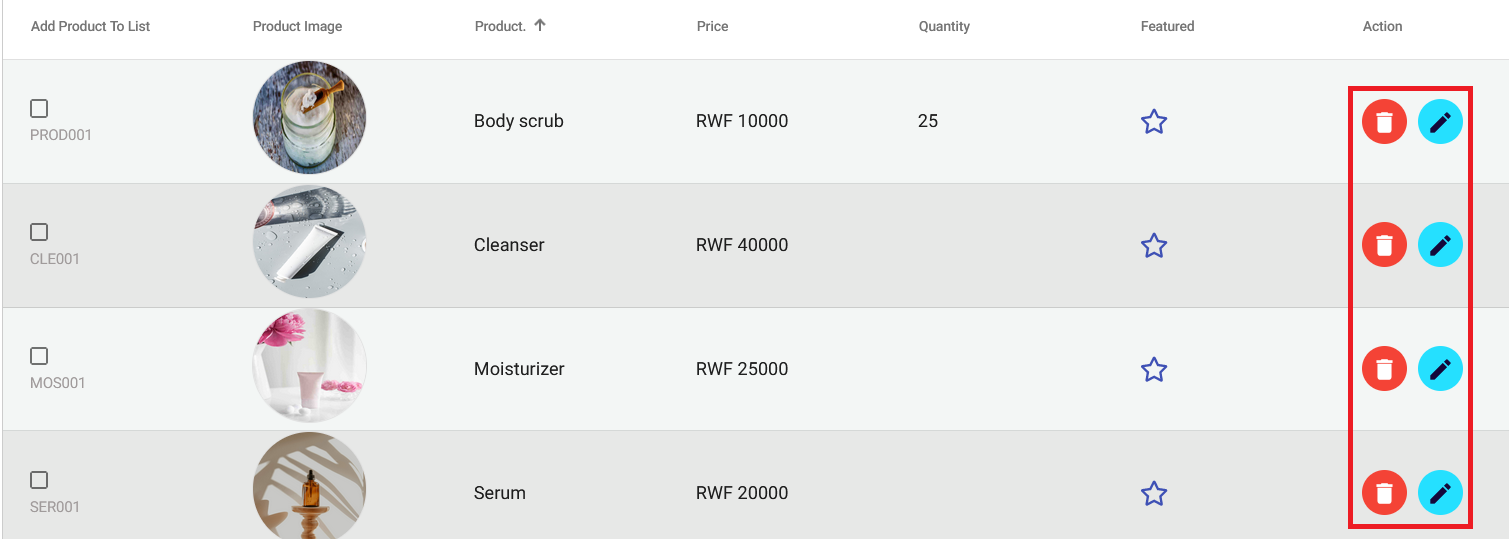
You can edit or delete a product by clicking on the edit and delete buttons on the product list.
When you select edit, you will be taken to the product details screen – change the relevant details and click “Update”
When you select delete, a confirmation screen will be displayed – click “Yes” to delete the product, and “No” to cancel the delete. Deleted products will immediately be removed from your store. They will, however, still be available in your order history for prior sales of the product


Set products as featured
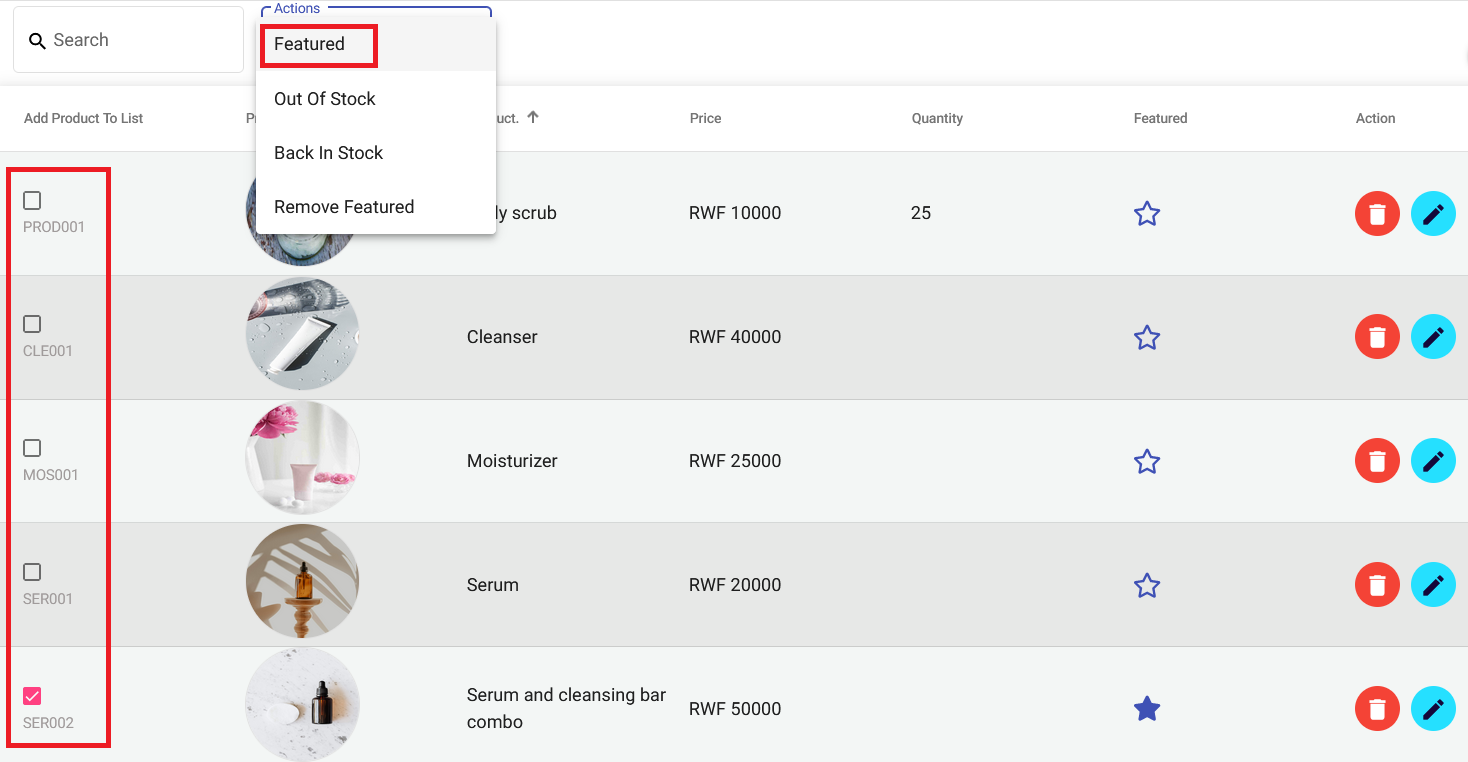
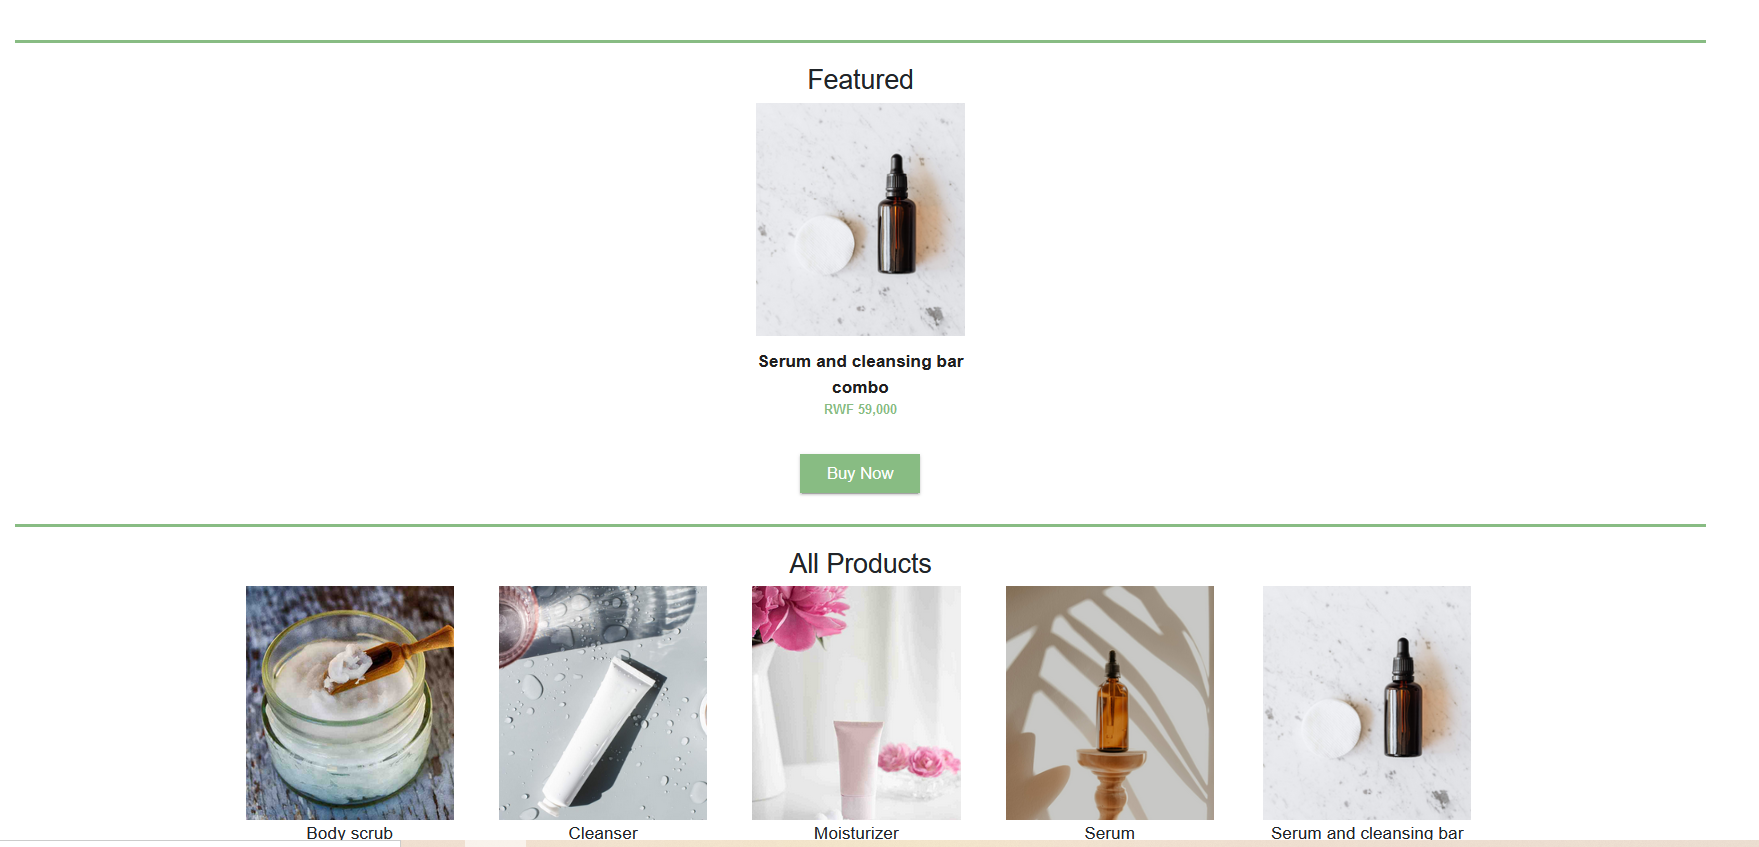
You can set a product as featured. Setting a product as featured will display the product at the top of the store page on your store. Use this feature to draw attention to special items that you’d like to draw your customers’ attention to – e.g. items on sale, new items, etc.
To set this status, click on the checkbox on the left of the product(s) you want to set, click on the “Actions” drop down, and select “Featured”. You can undo this setting by selecting “Remove featured”


Set products as out of stock
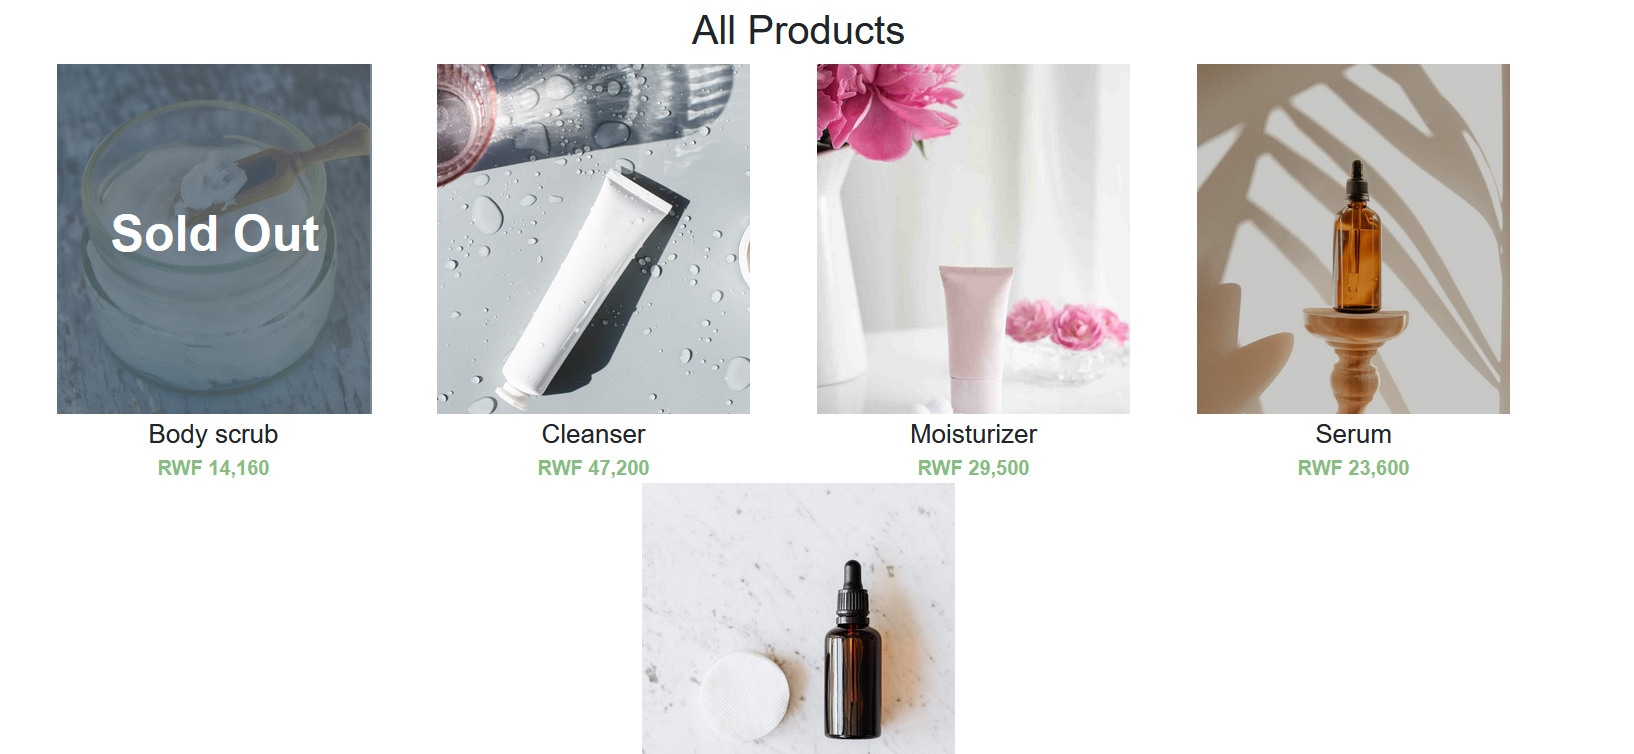
You can set a product as out of stock. Setting a product as out of stock will leave the product on your store, with an “Sold Out” banner displayed on the product. Your customers will not be able to add this product to the cart. Use this feature for products that periodically go out of stock, that you will replenish. This makes your customers aware that you do stock this product.
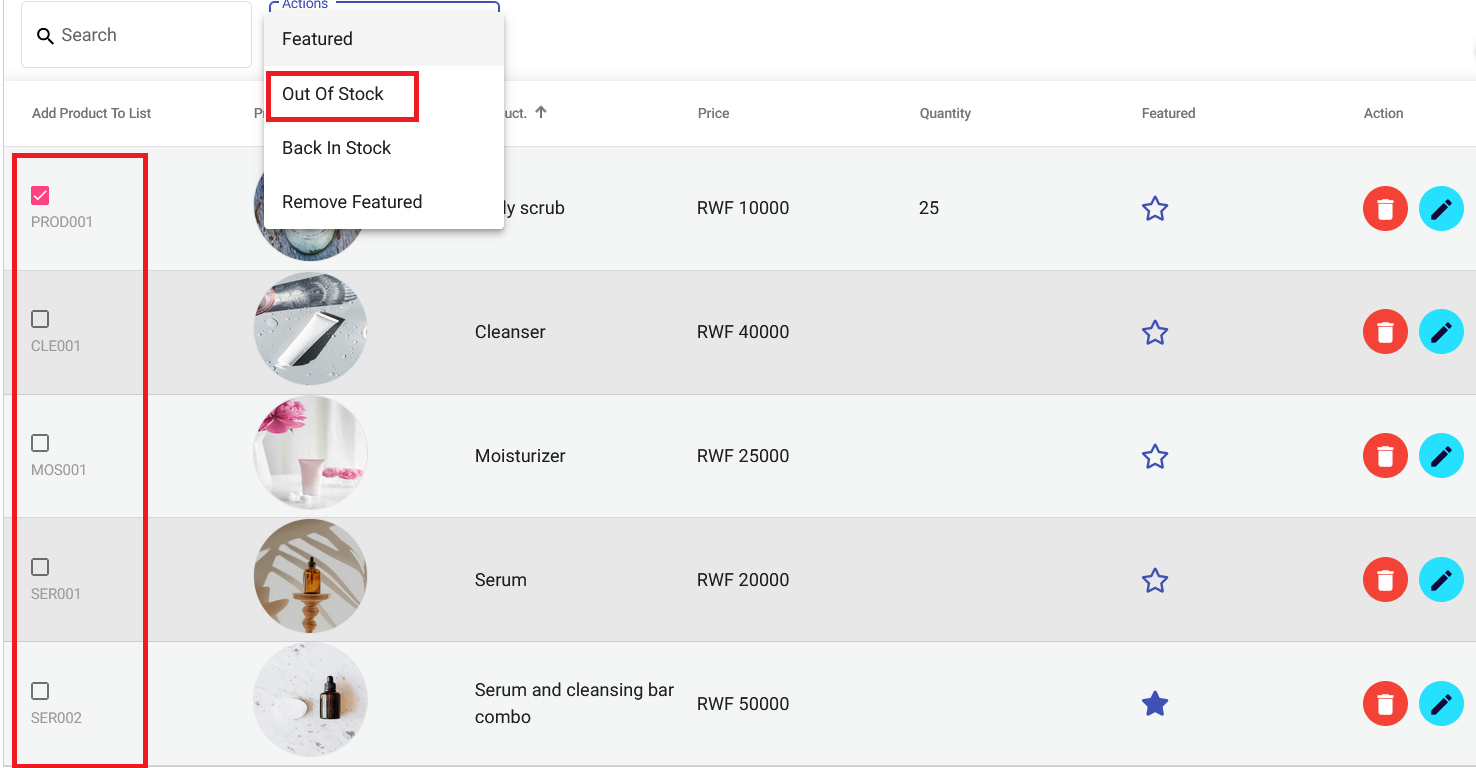
To set this status, click on the checkbox on the left of the product you want to set, click on the “Actions” drop down, and select “Out of stock”. You can undo this setting by selecting “Back in stock”


Create product categories
Creating categories allows you to group similar products together, making it easier for your customers to find them
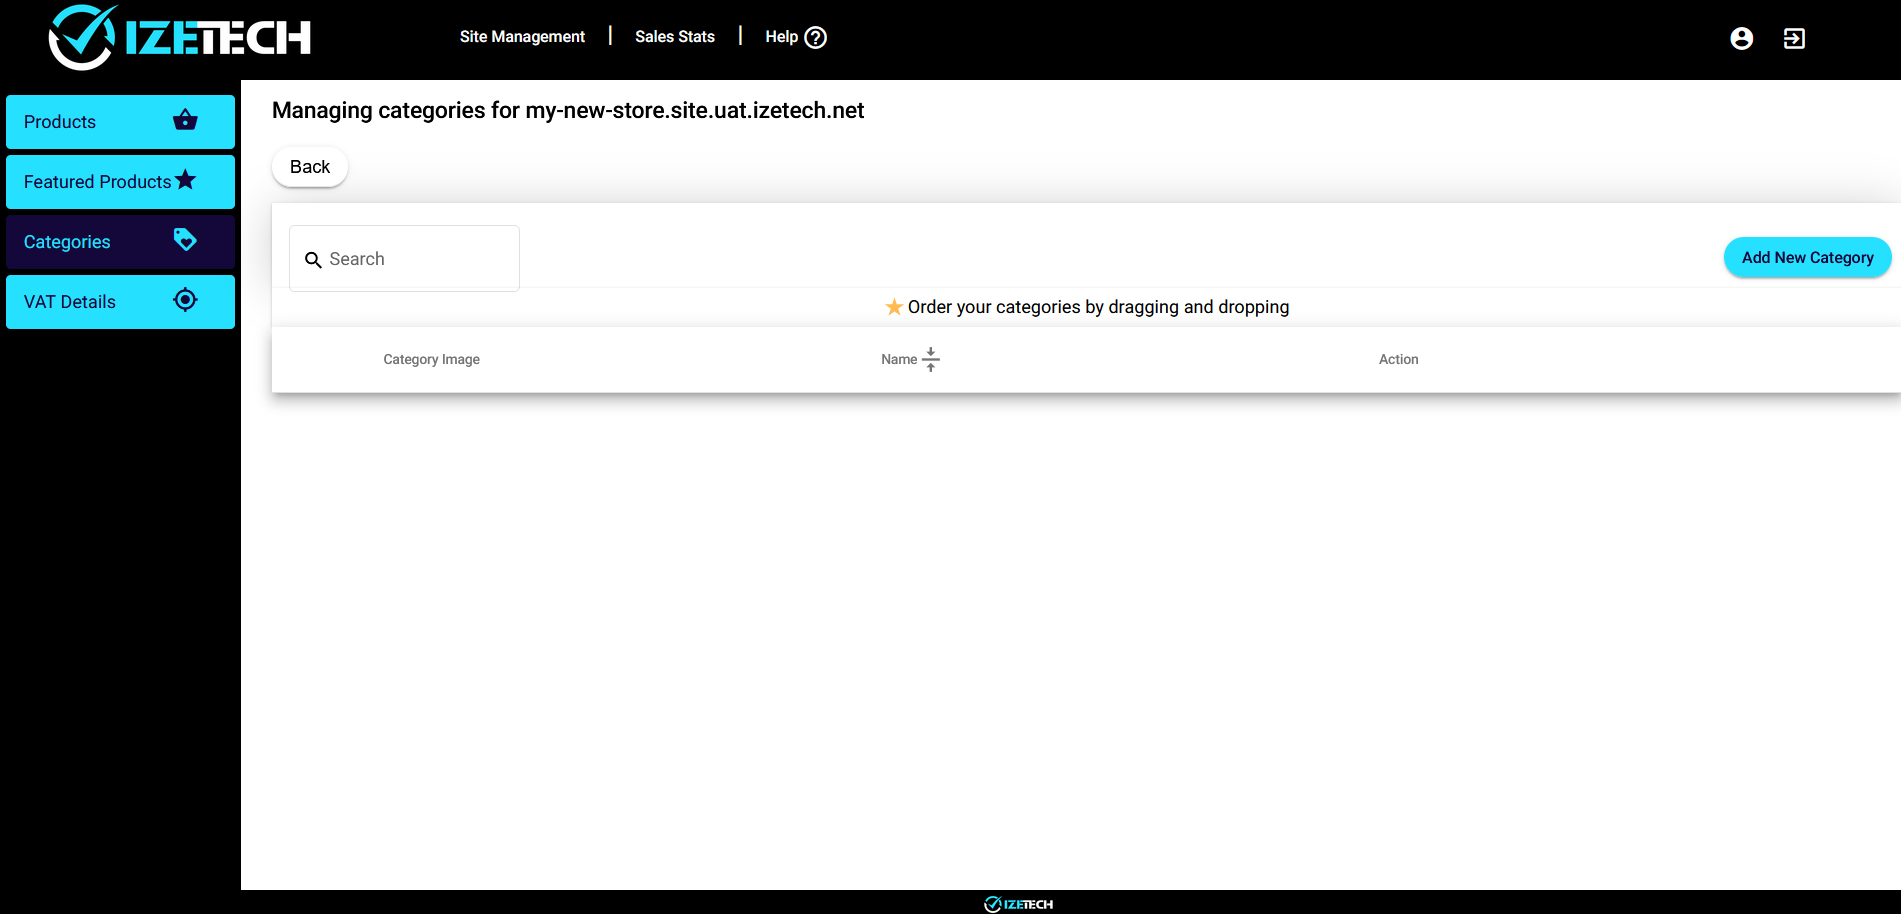
Click on “Categories” on the menu on the left. If you have added categories before, they will be displayed. If not, you will see an empty list. Click “Add New Category”


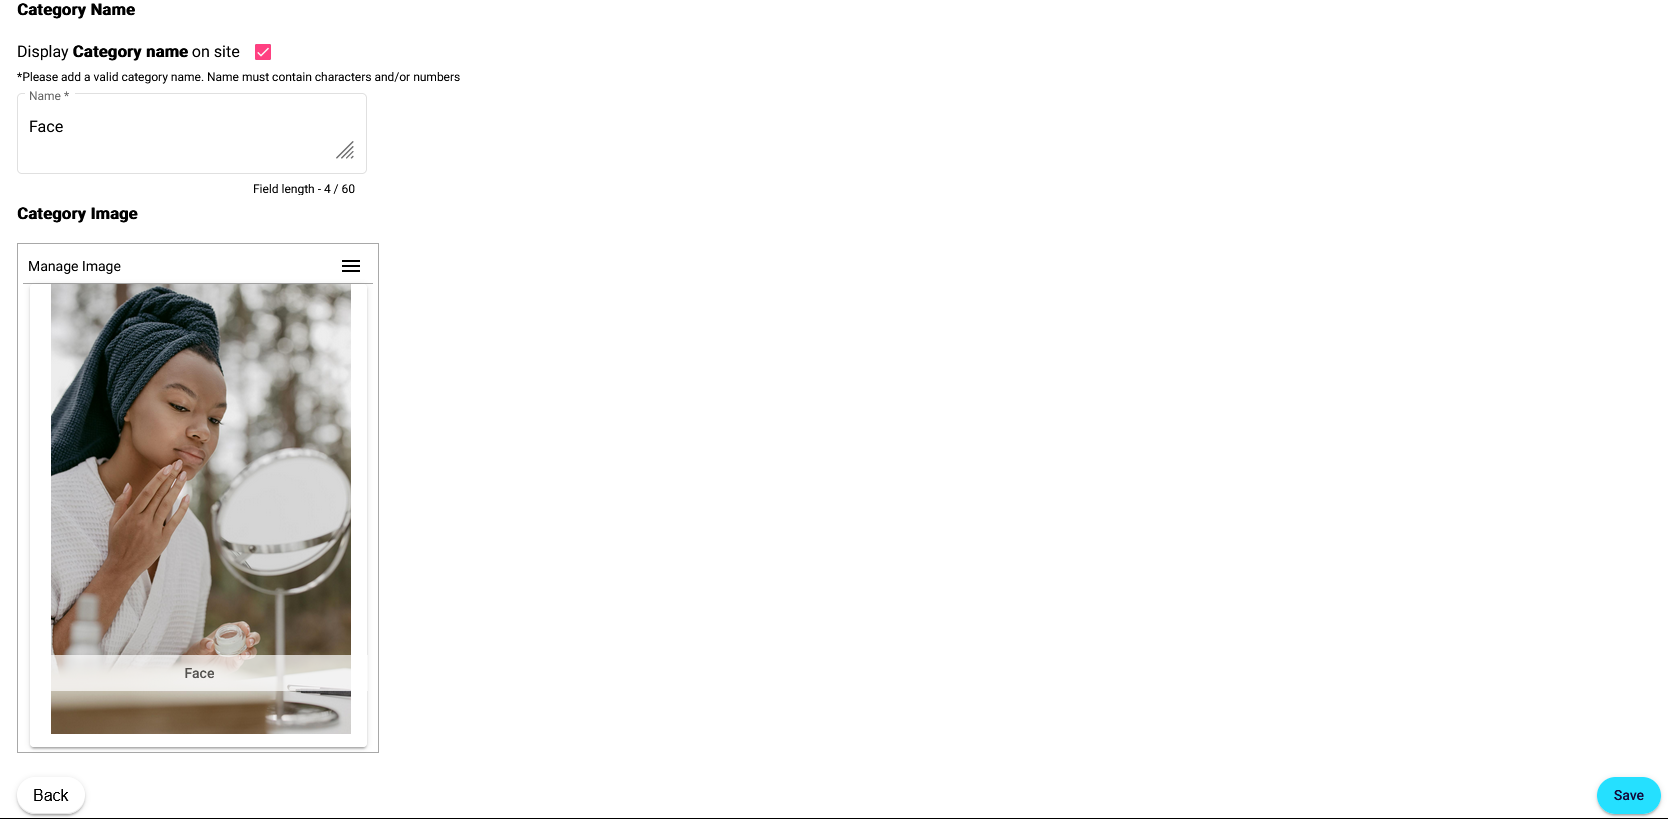
Give your category a name and upload an image that represents the category.
The category name is mandatory, but you do have the option to display this name on your store or not. You may have a category image that includes the name, and in this case you may not want the name displayed. You can switch this off by unchecking the “Display category name on site” box


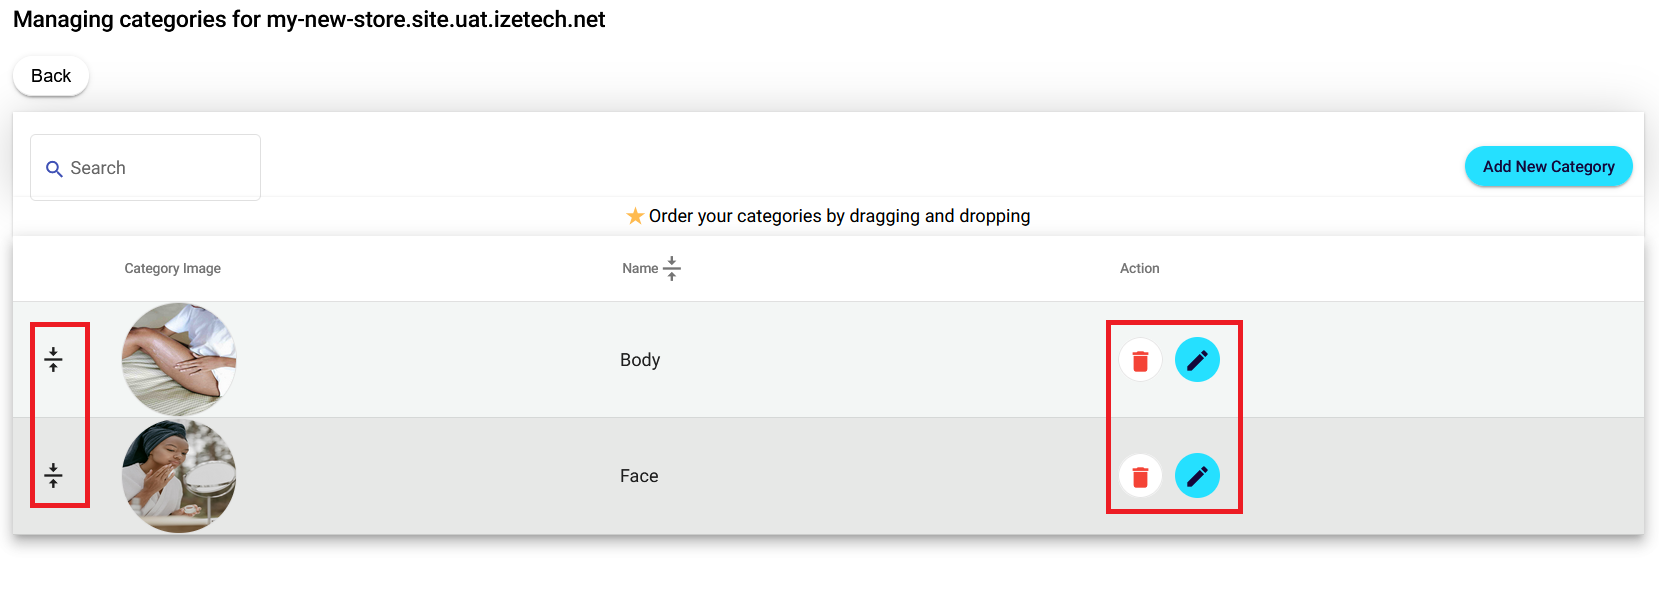
Once you have added your categories, they will be displayed in a list.
You can edit or delete a category by clicking on the edit and delete buttons on the category list.
When you select edit, you will be taken to the category details screen – change the relevant details and click “Update”
When you select delete, a confirmation screen will be displayed – click “Yes” to delete the category , and “No” to cancel the delete. Deleted categories will immediately be removed from your store.
You can reorder the display sequence of the categories by clicking the arrow image next to a category and dragging and dropping the category to the order you prefer.


Once you have added your categories, you can link them to products when adding or editing the products.
Once a category has a product linked to it, it will be displayed on the store page. When your customer clicks on a category, it will filter the list of products and only display the products linked to that category.
